 "It's a "Porch-uh"" (ikazuchi)
04/27/2016 at 17:48 • Filed to: go sim racer go, build threads
 1
1
 8
8|
"It's a "Porch-uh"" (ikazuchi)
04/27/2016 at 17:48 • Filed to: go sim racer go, build threads | 1
| 8 |
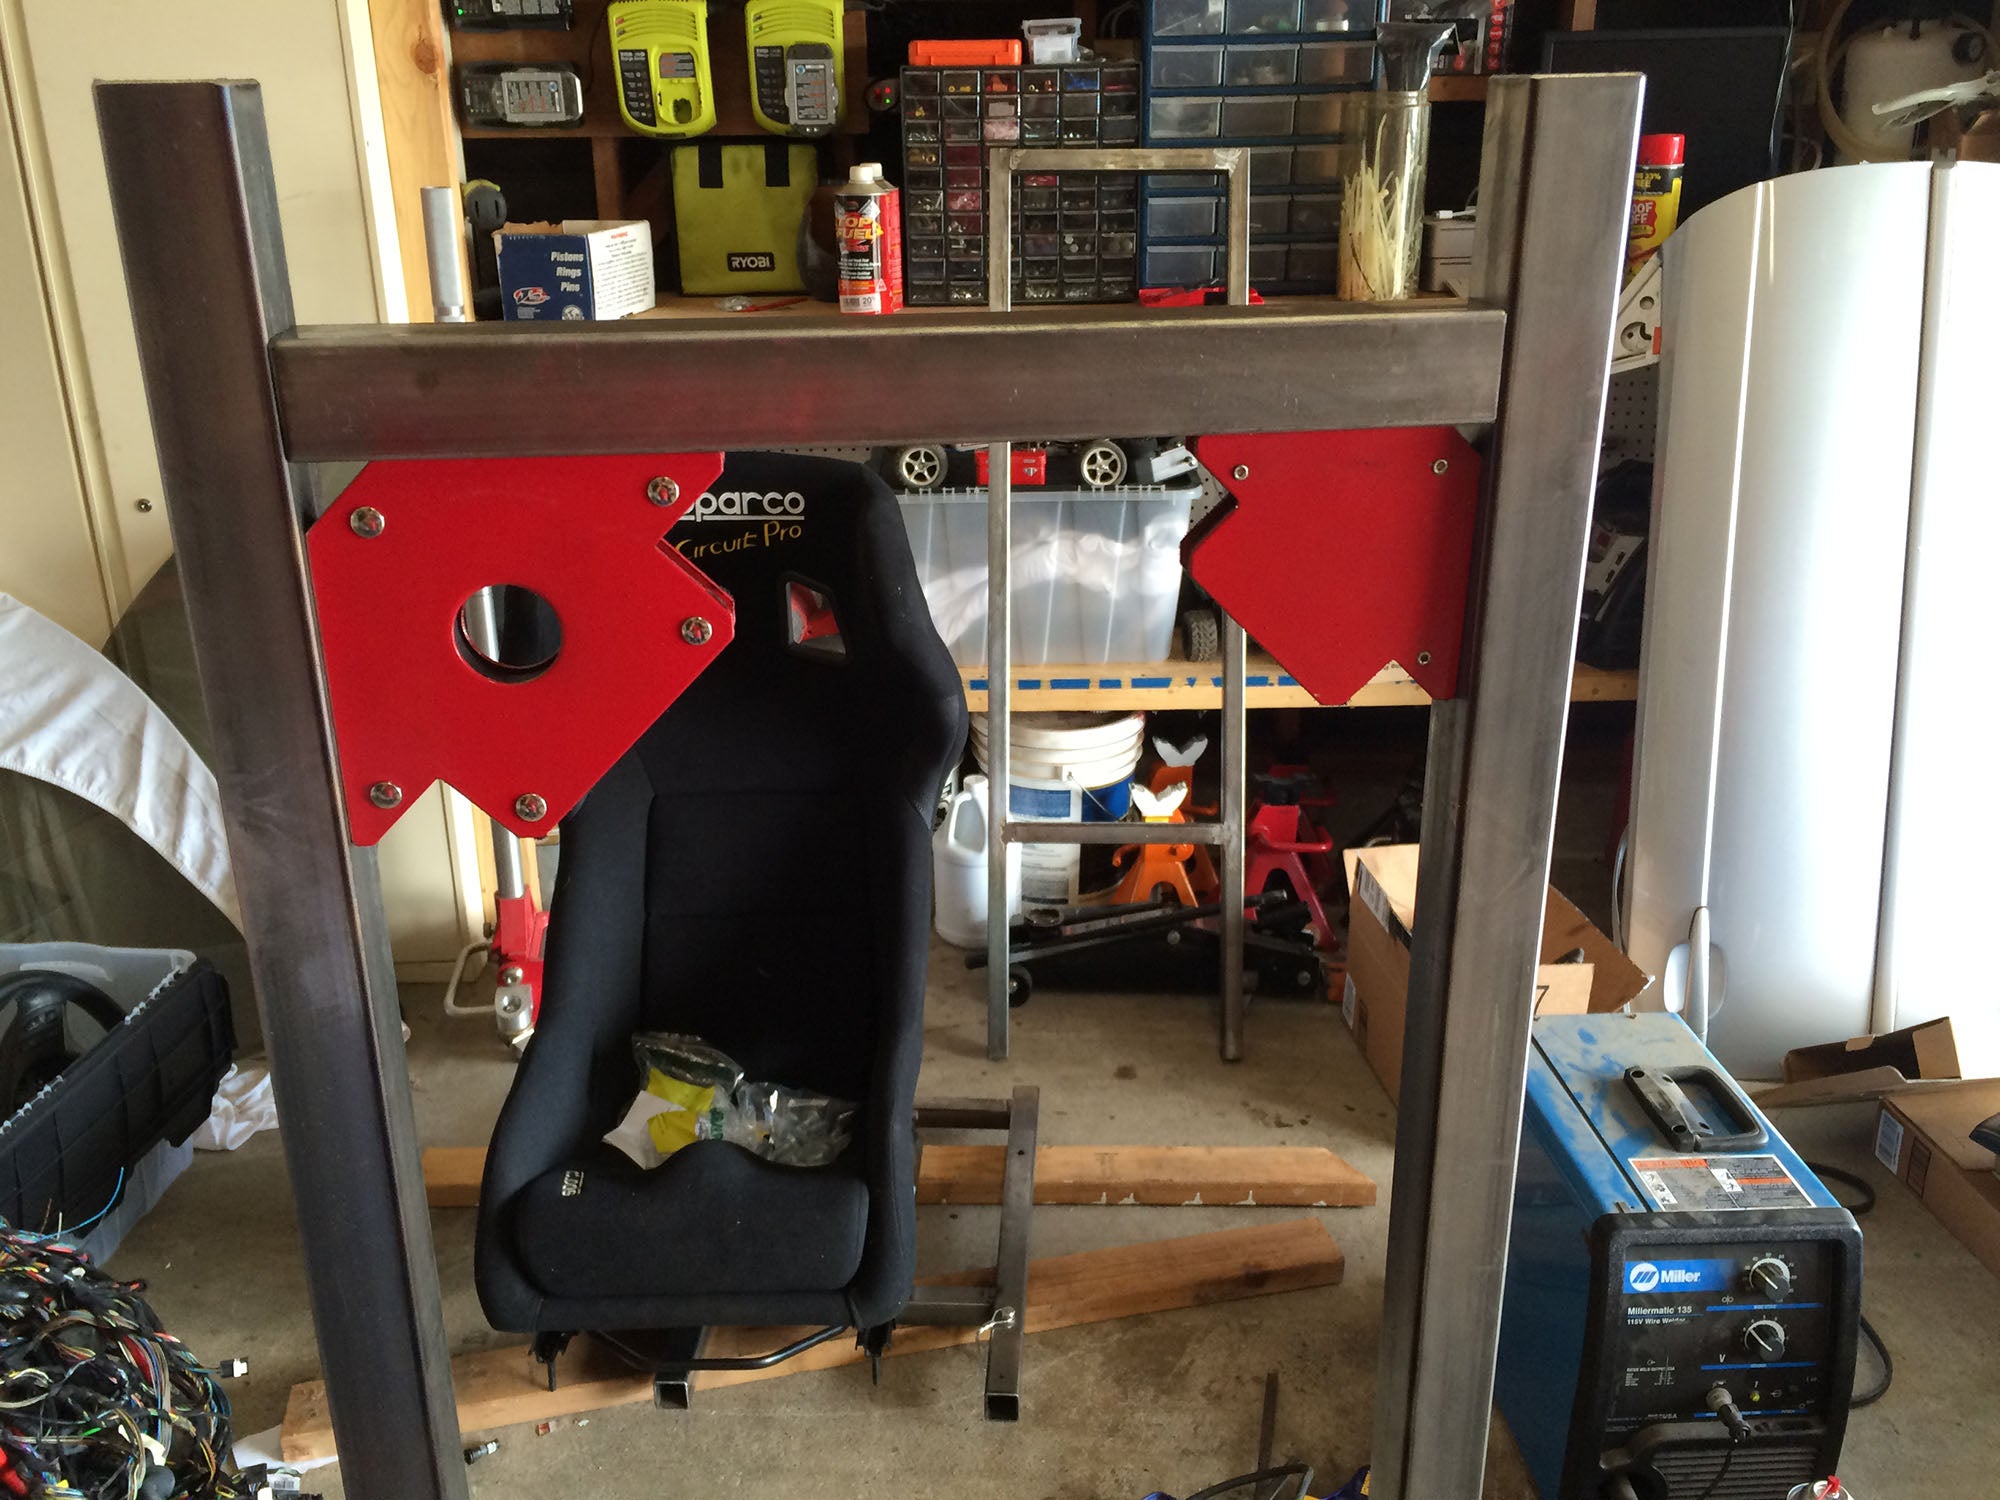
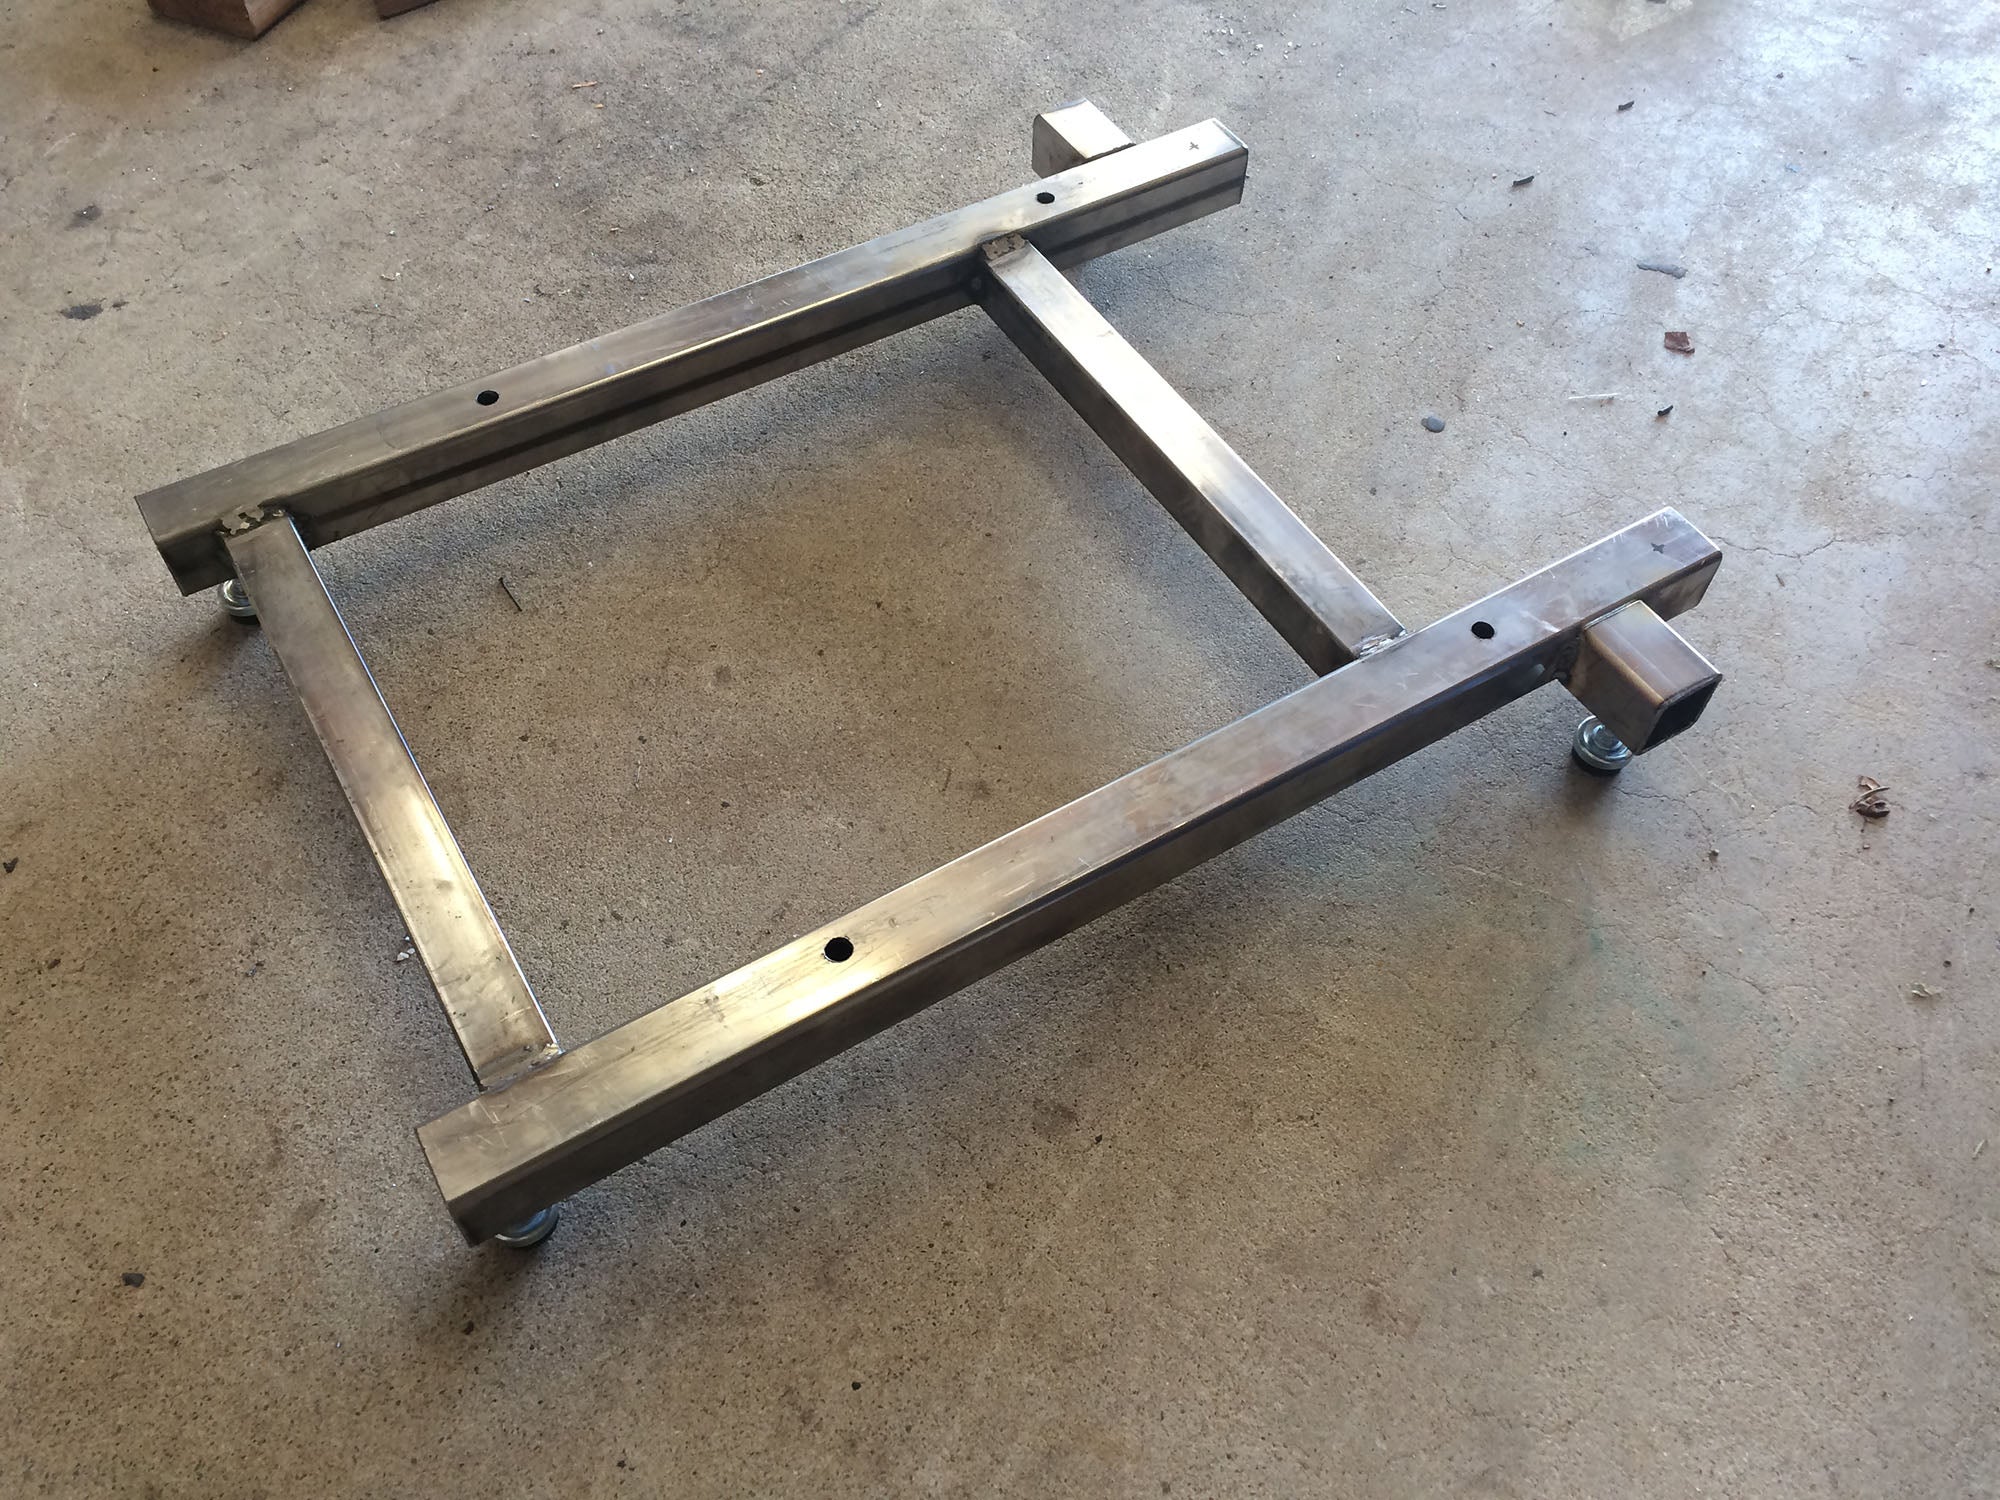
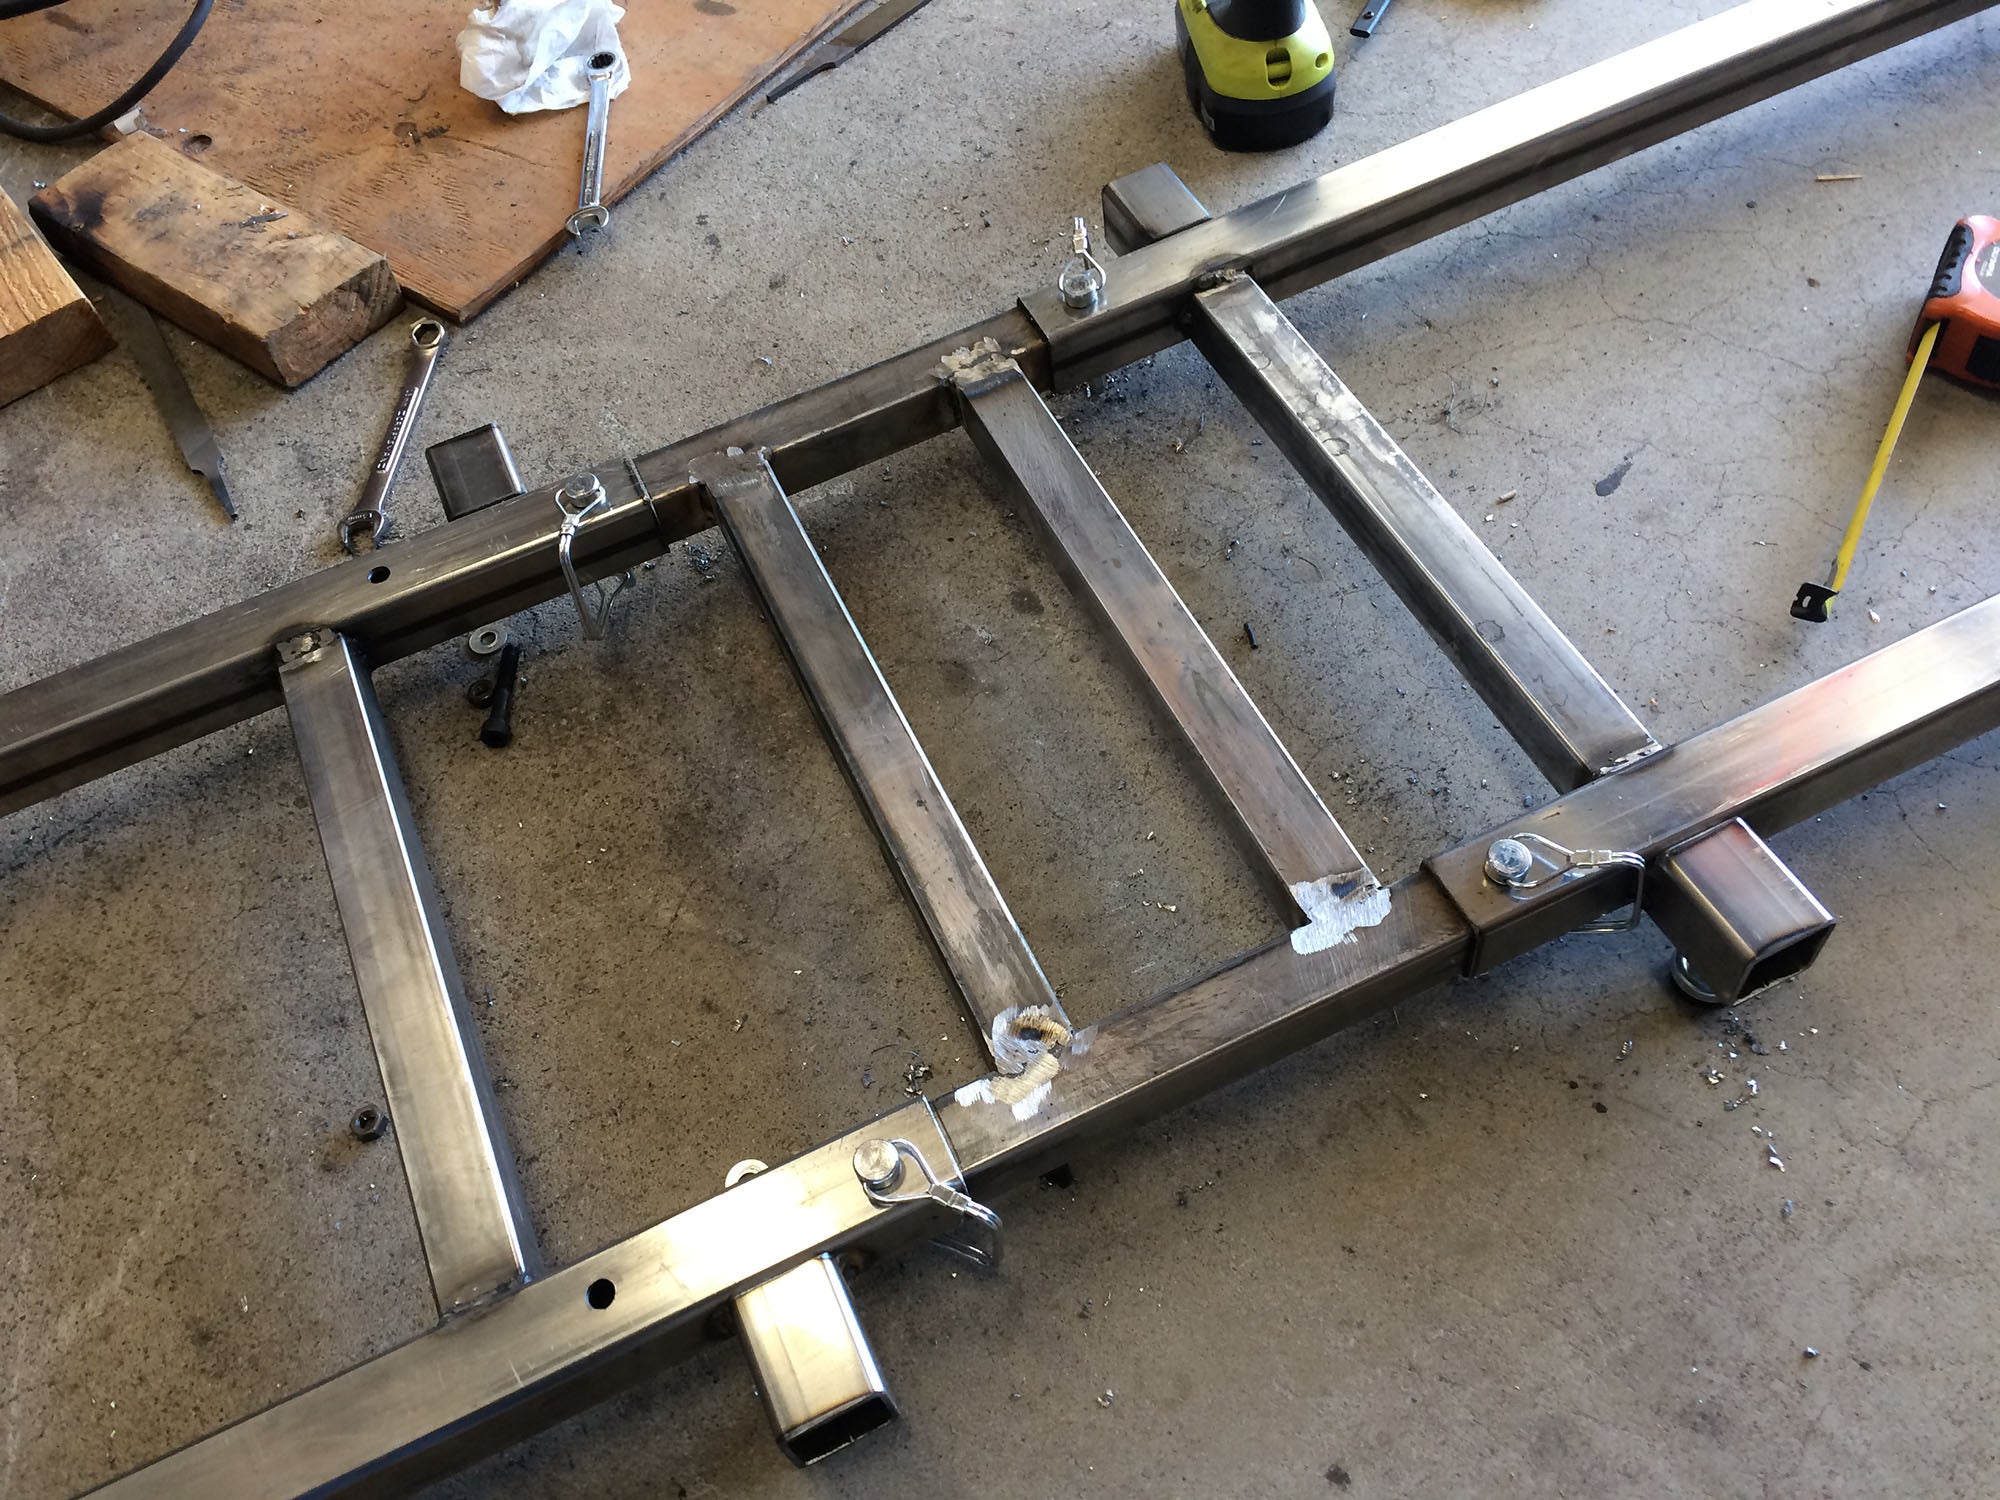
So after having to rebuild the frame for the TV mount, I’m making some progress on the build. This was my first time welding together something square, and I had seen some fabricators use these handy magnets to hold things together, so I stopped by the local welding supply shop and grabbed a few. If you ever do any metal work like this, they are very nice to have around. Now I can quickly and easily hold something together, and make sure it’s sitting perpendicular.
Here is !!!error: Indecipherable SUB-paragraph formatting!!! and !!!error: Indecipherable SUB-paragraph formatting!!! if you need to catch up.
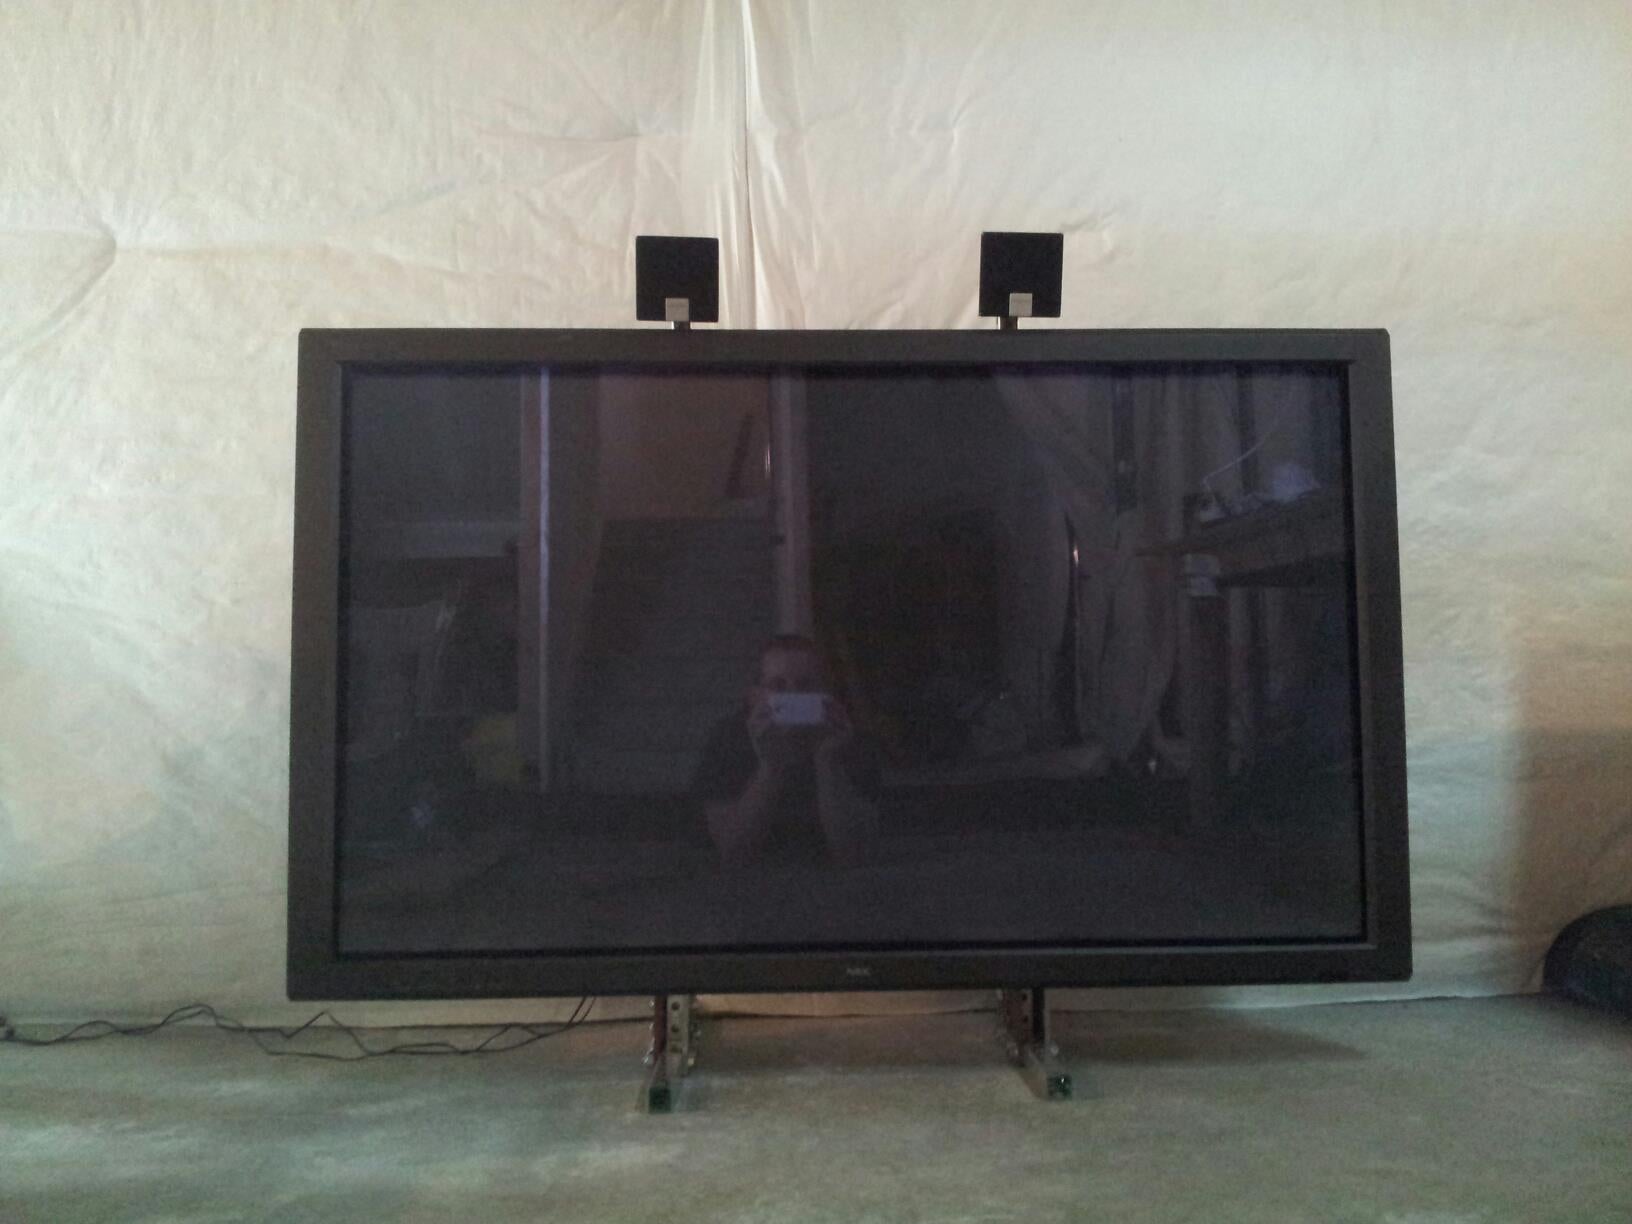
The “arms” hanging off the sides of the frame will be where the pieces of slotted angle steel (as seen attached to the TV in the background) will hang and bolt to the TV. Why I decided to put the top arm flush at the top but make the cross-bar on the frame down a few inches, I couldn’t tell you, but it is behind the TV and will be up against a wall, so I will rarely see it.
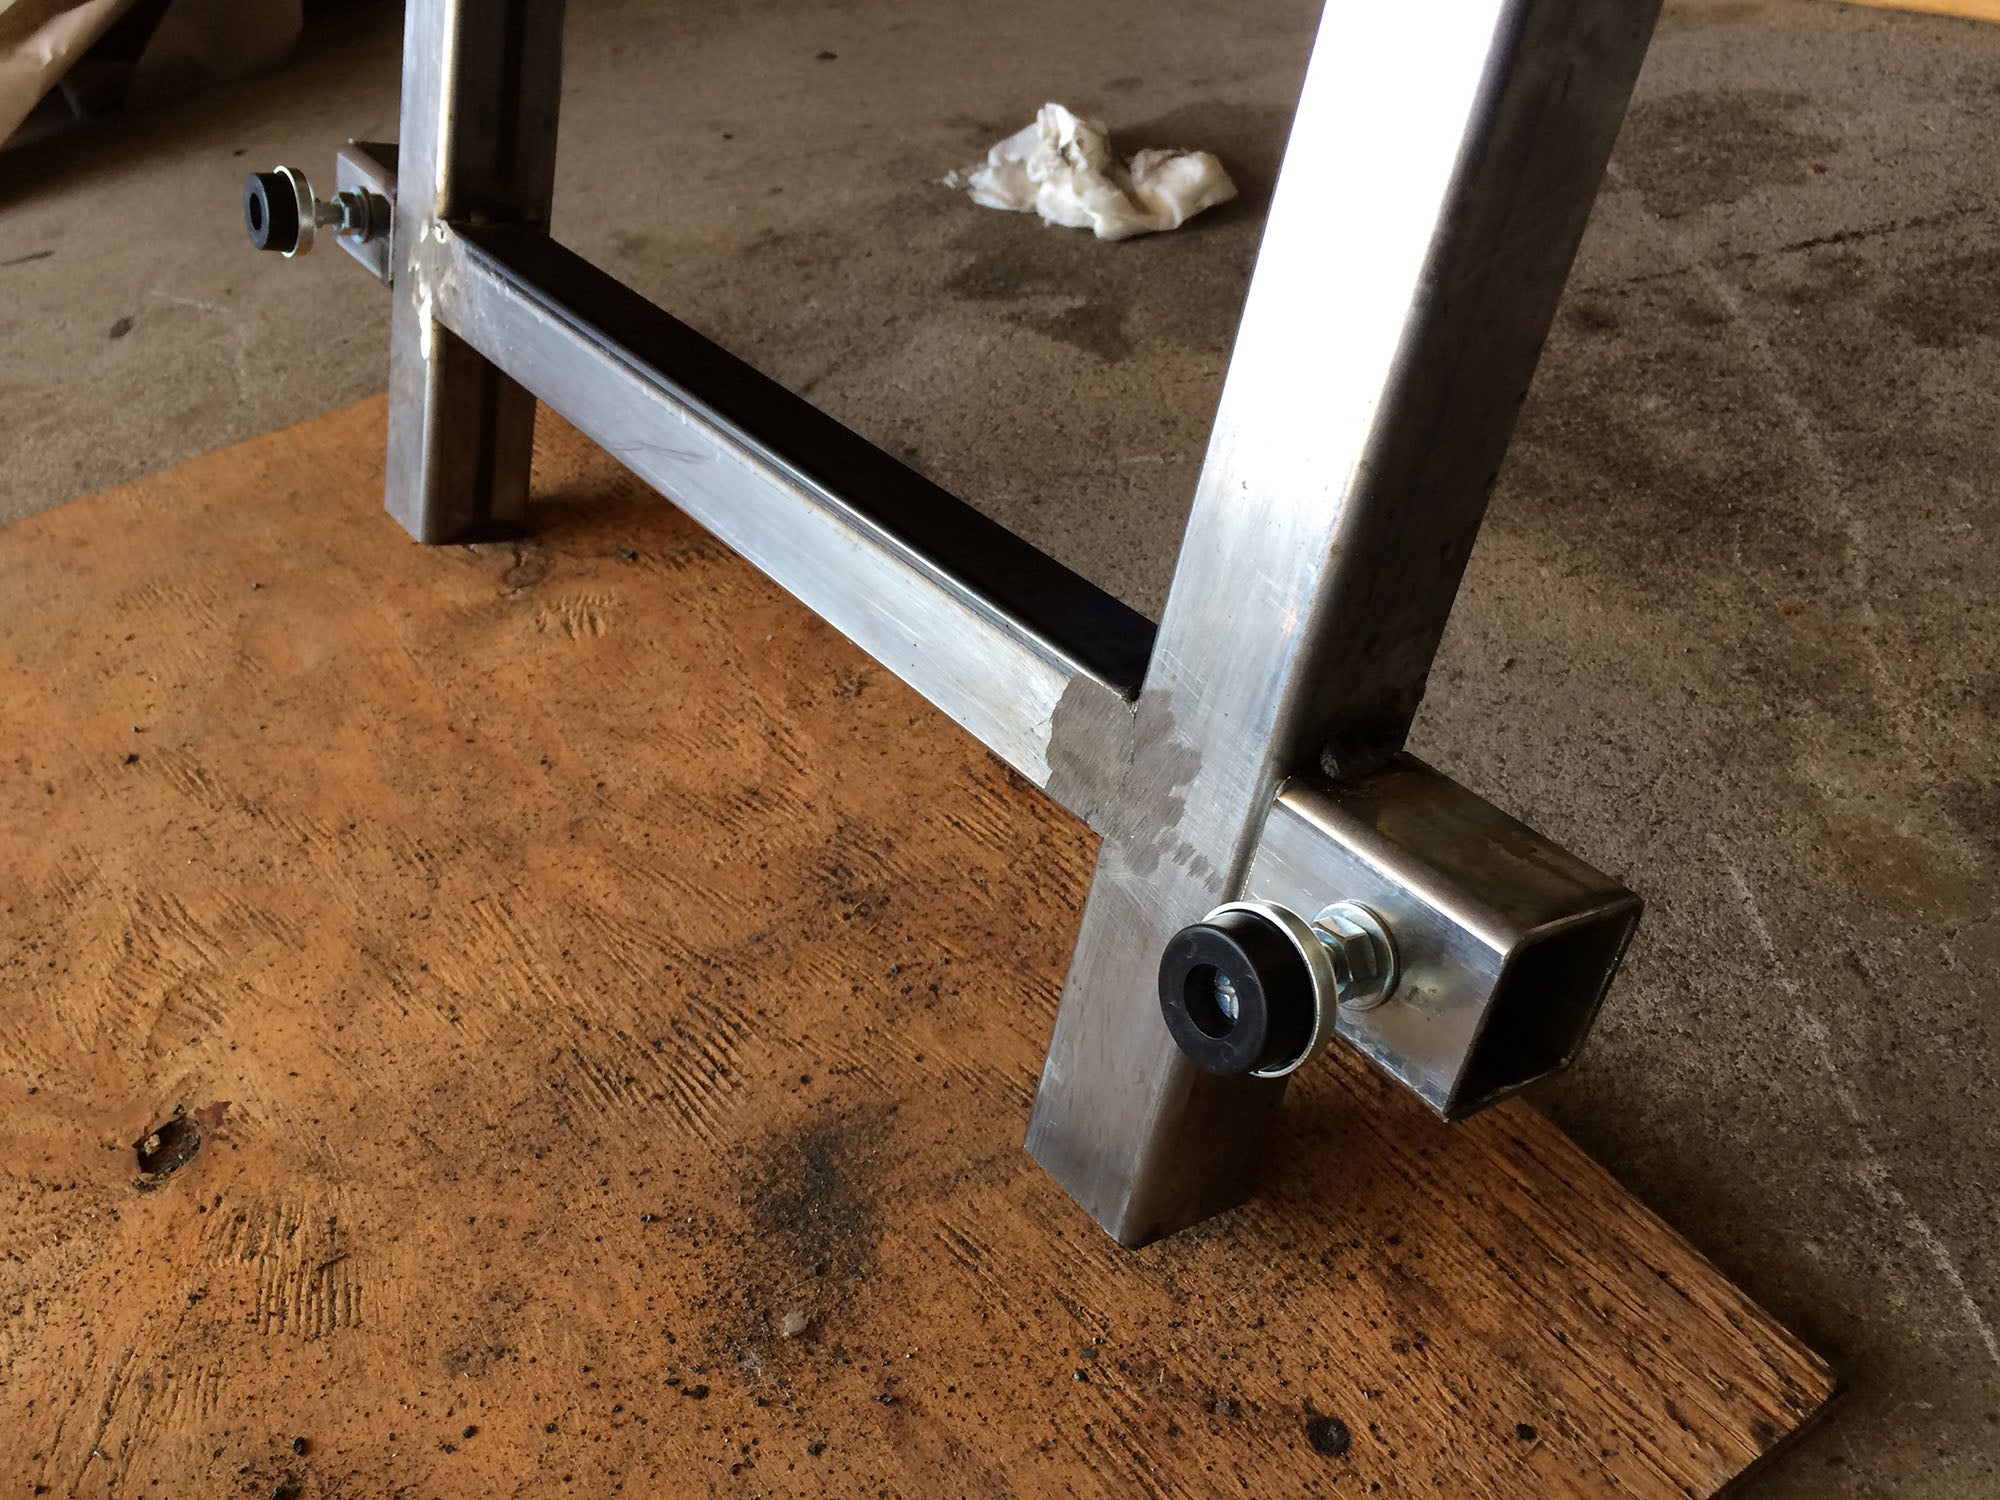
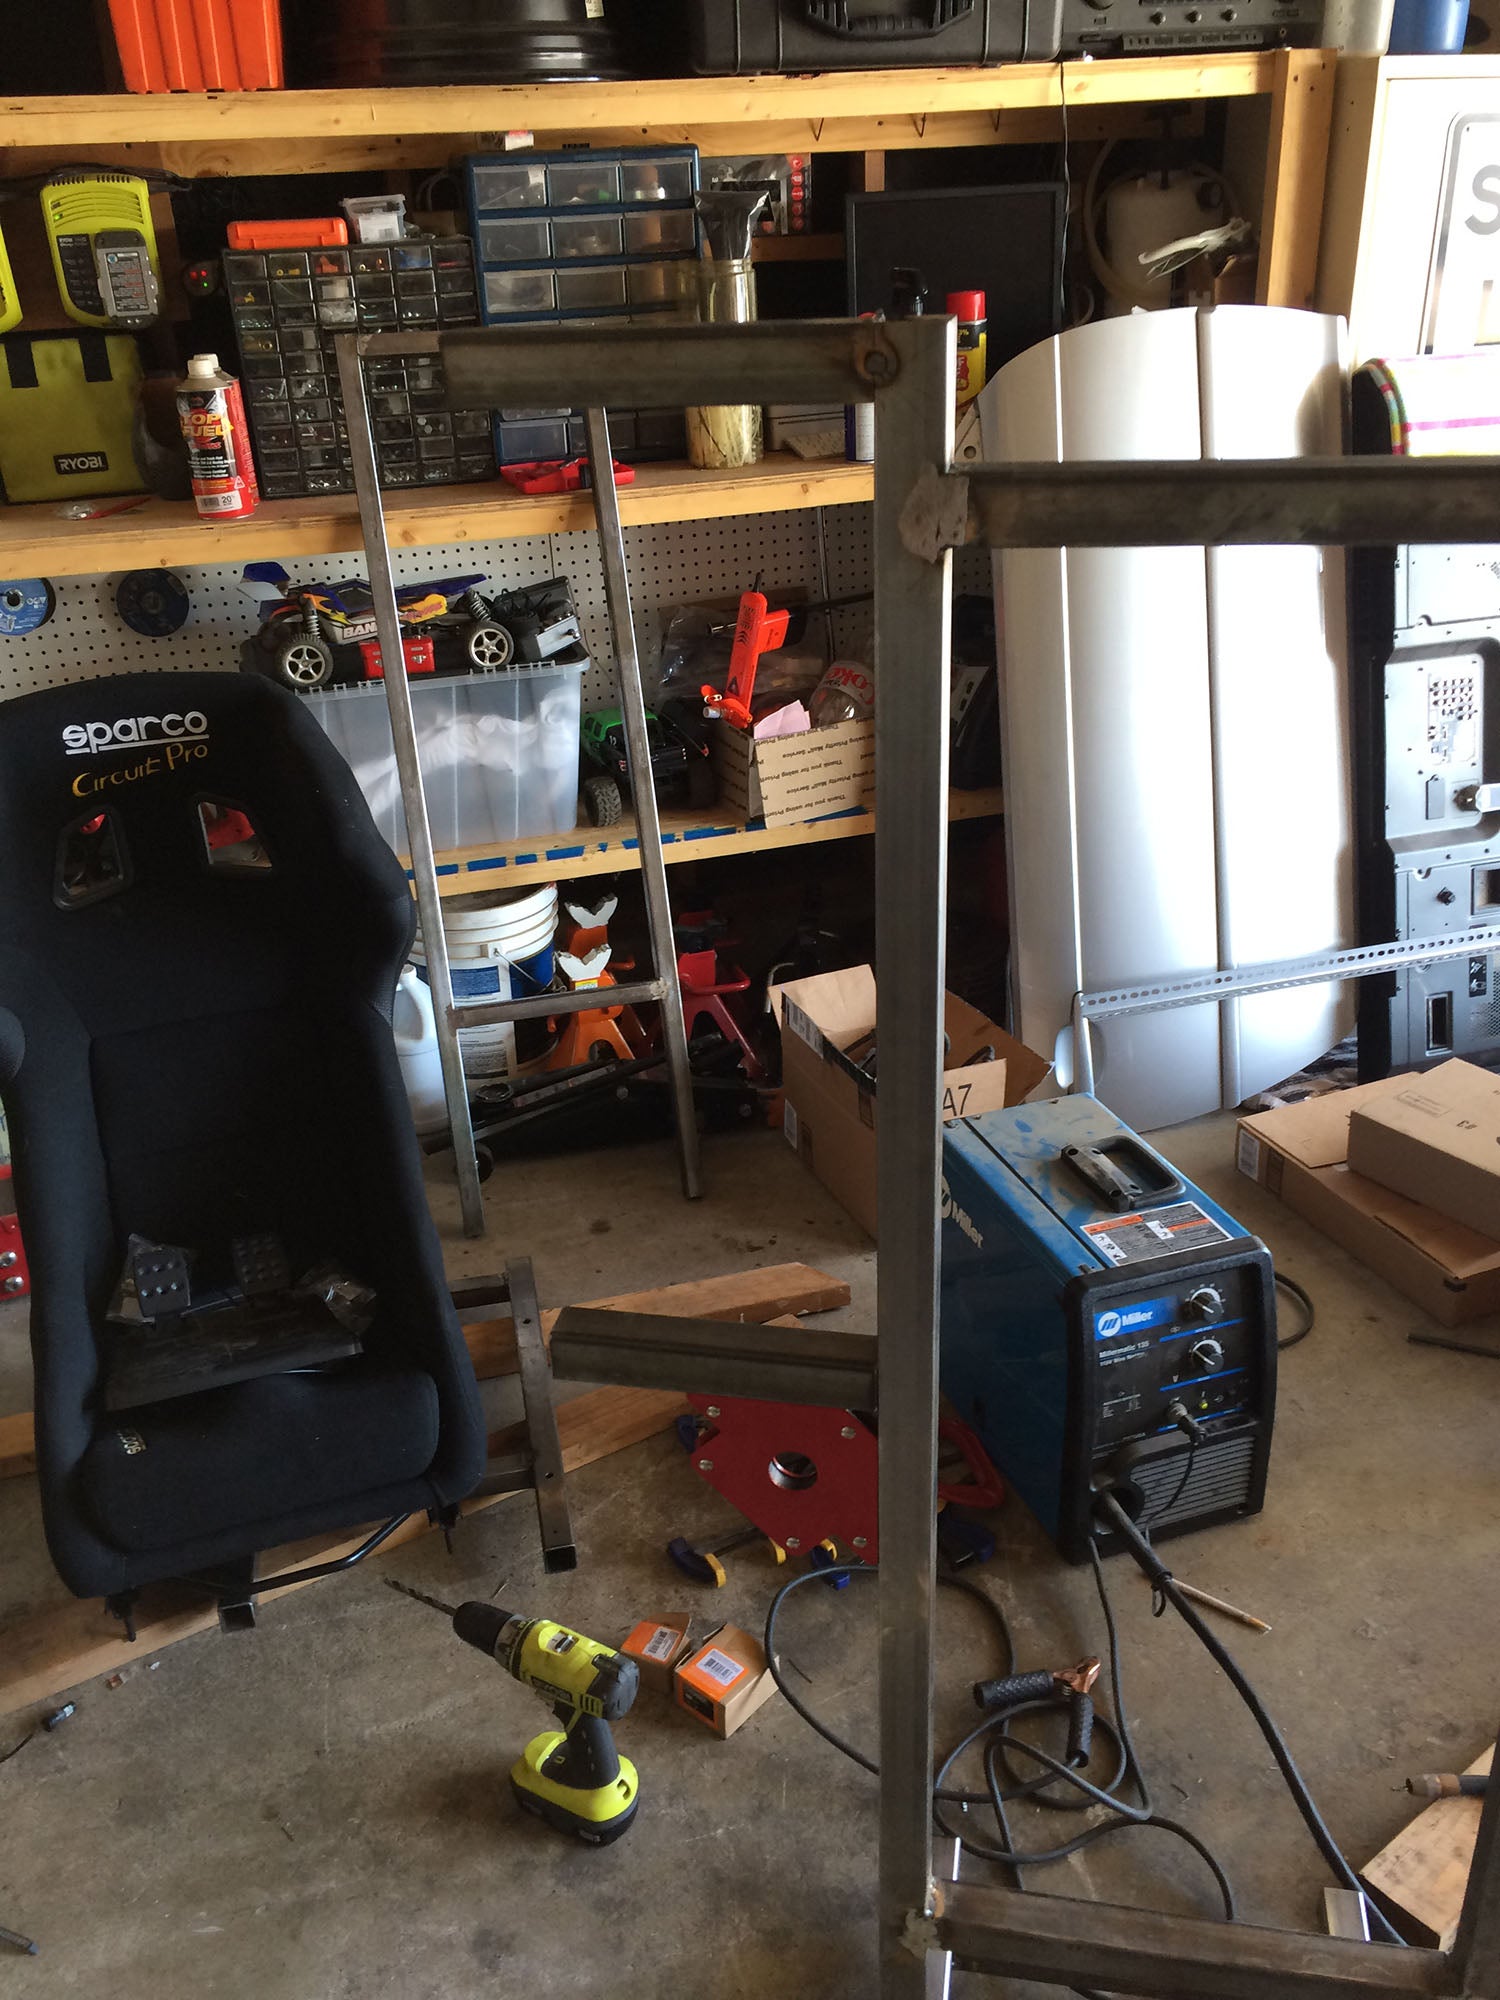
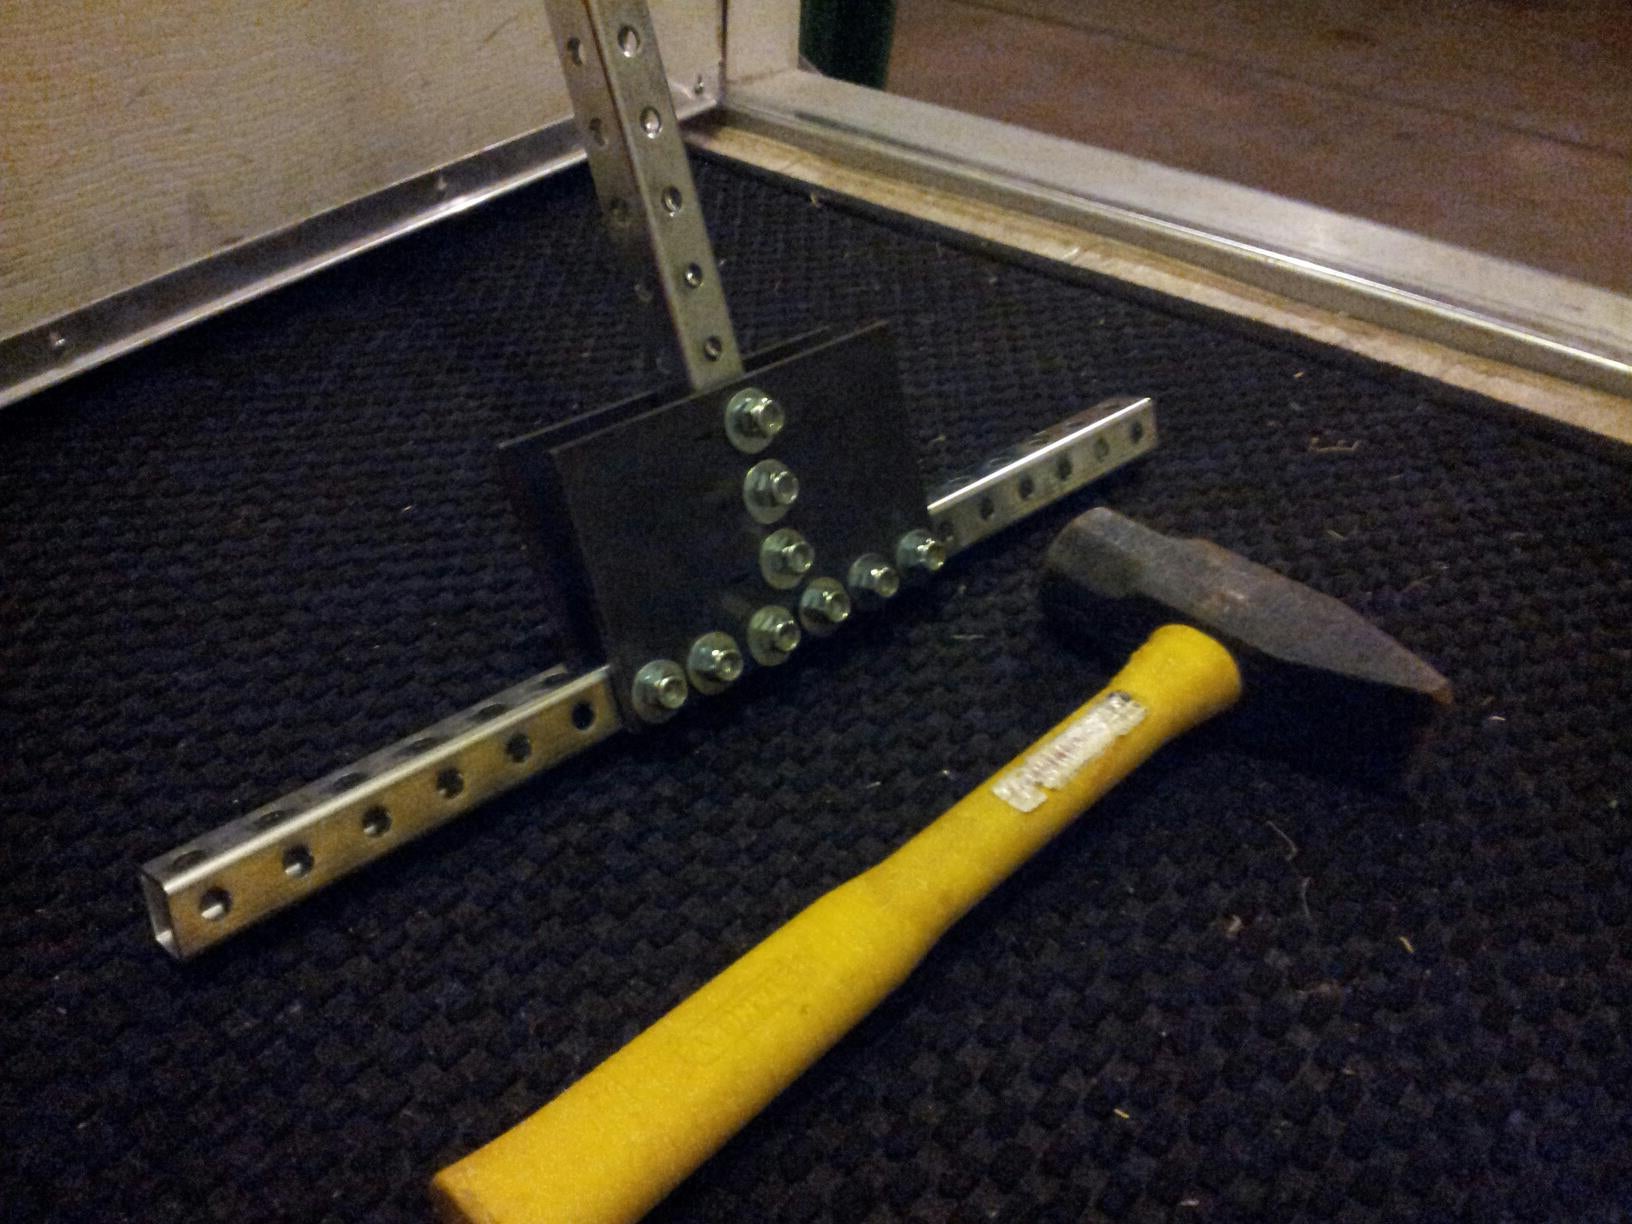
Then I attached the leveling feet. The back two could go right into the frame, but I had to add these short outboard sections for the front feet, as I couldn’t have the threads interfering where the center section will slide through. These also provide a bit of extra stability being a little farther out. The feet on the seat base were done the same way.
Now to mount up the ridiculously heavy 50" plasma-screen TV.
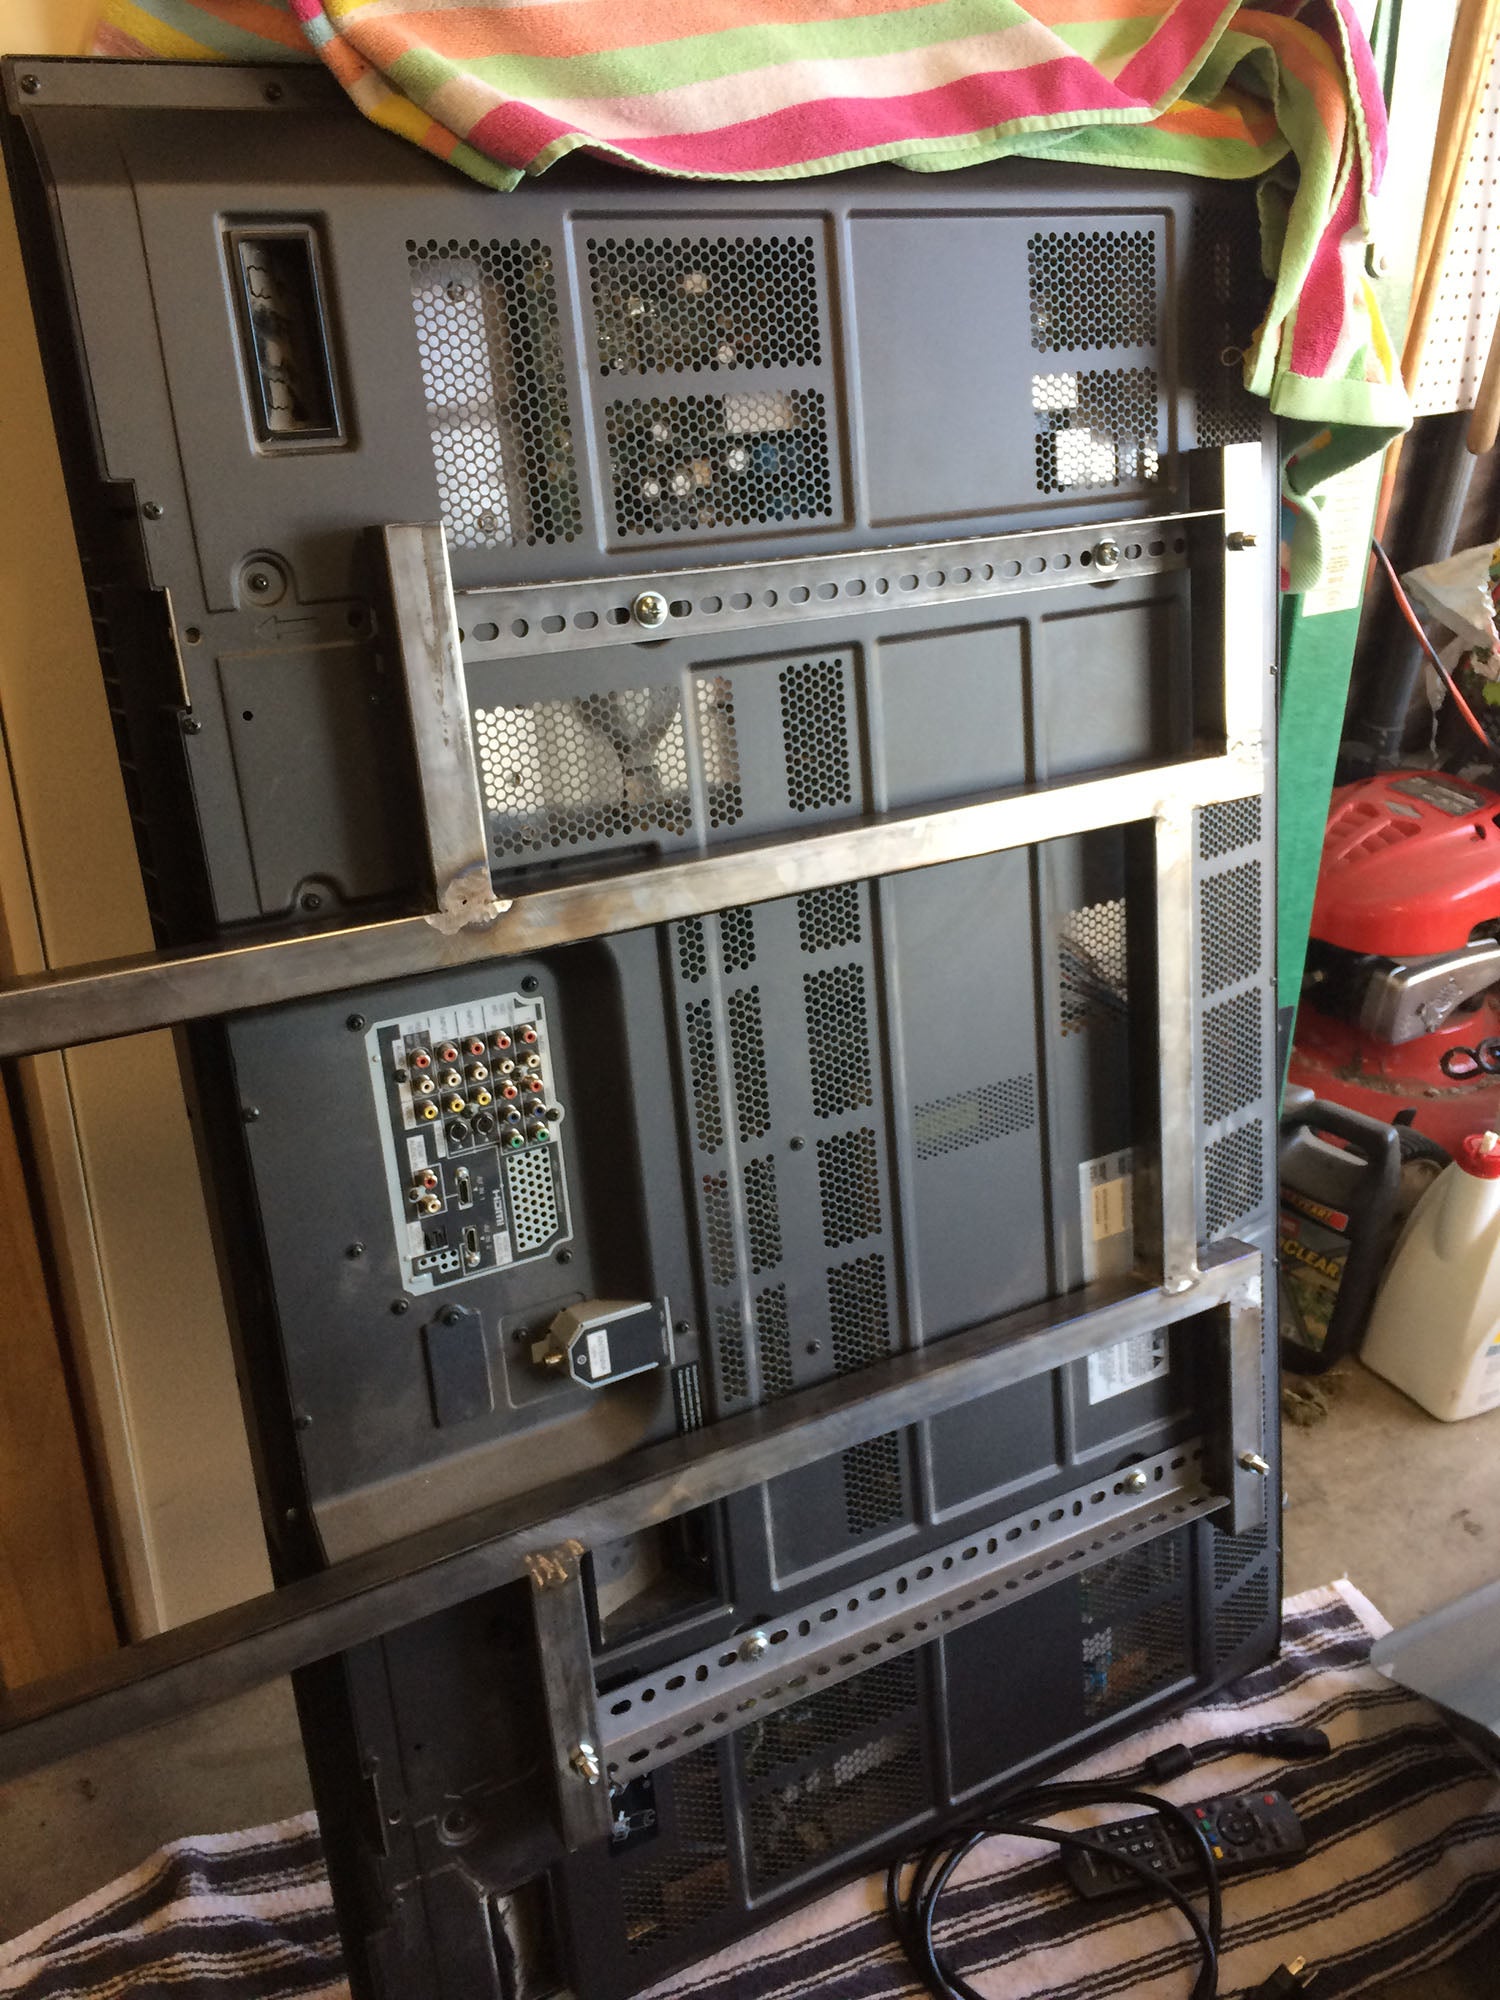
With the TV frame removable from the base, I could easily take it off and mount the TV, then pick it all up and drop it back onto the base. The slotted angle pieces allow me to easily mount another TV with slightly different mounting points (foreshadowing!). Each side was cut and notched to fit between each arm on the frame.
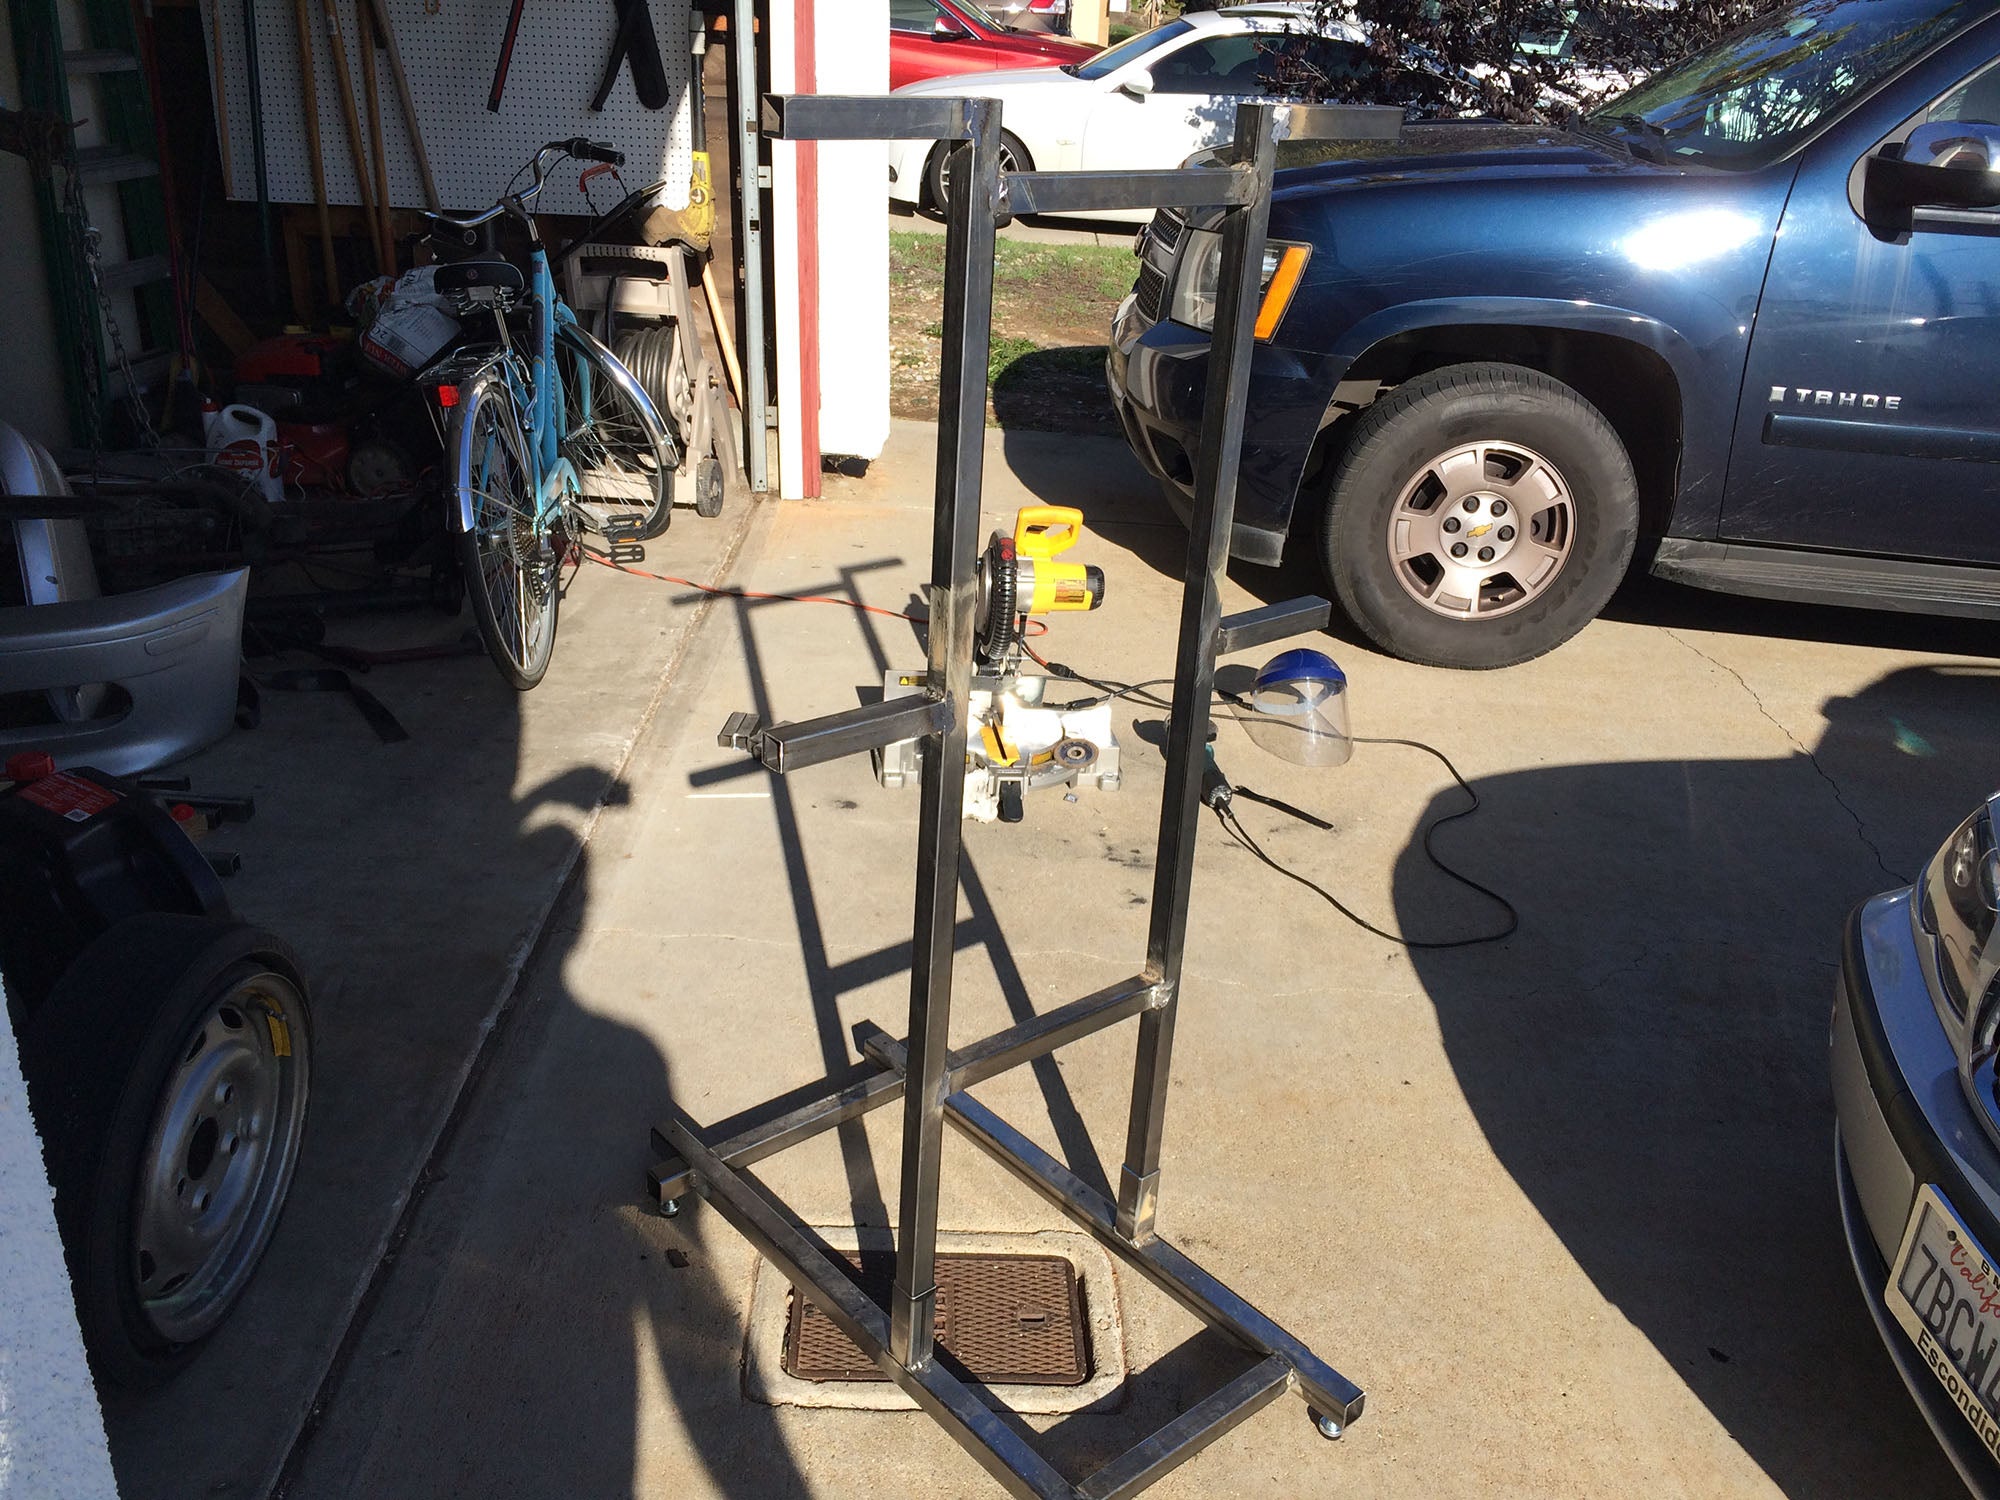
Quick safety tip: Never weld zinc-plated/galvanized steel (like these slotted angle pieces) without serious respiration safety gear. It puts off some really nasty fumes. I ended up bolting those pieces on, but mostly so I can move them later if need be.
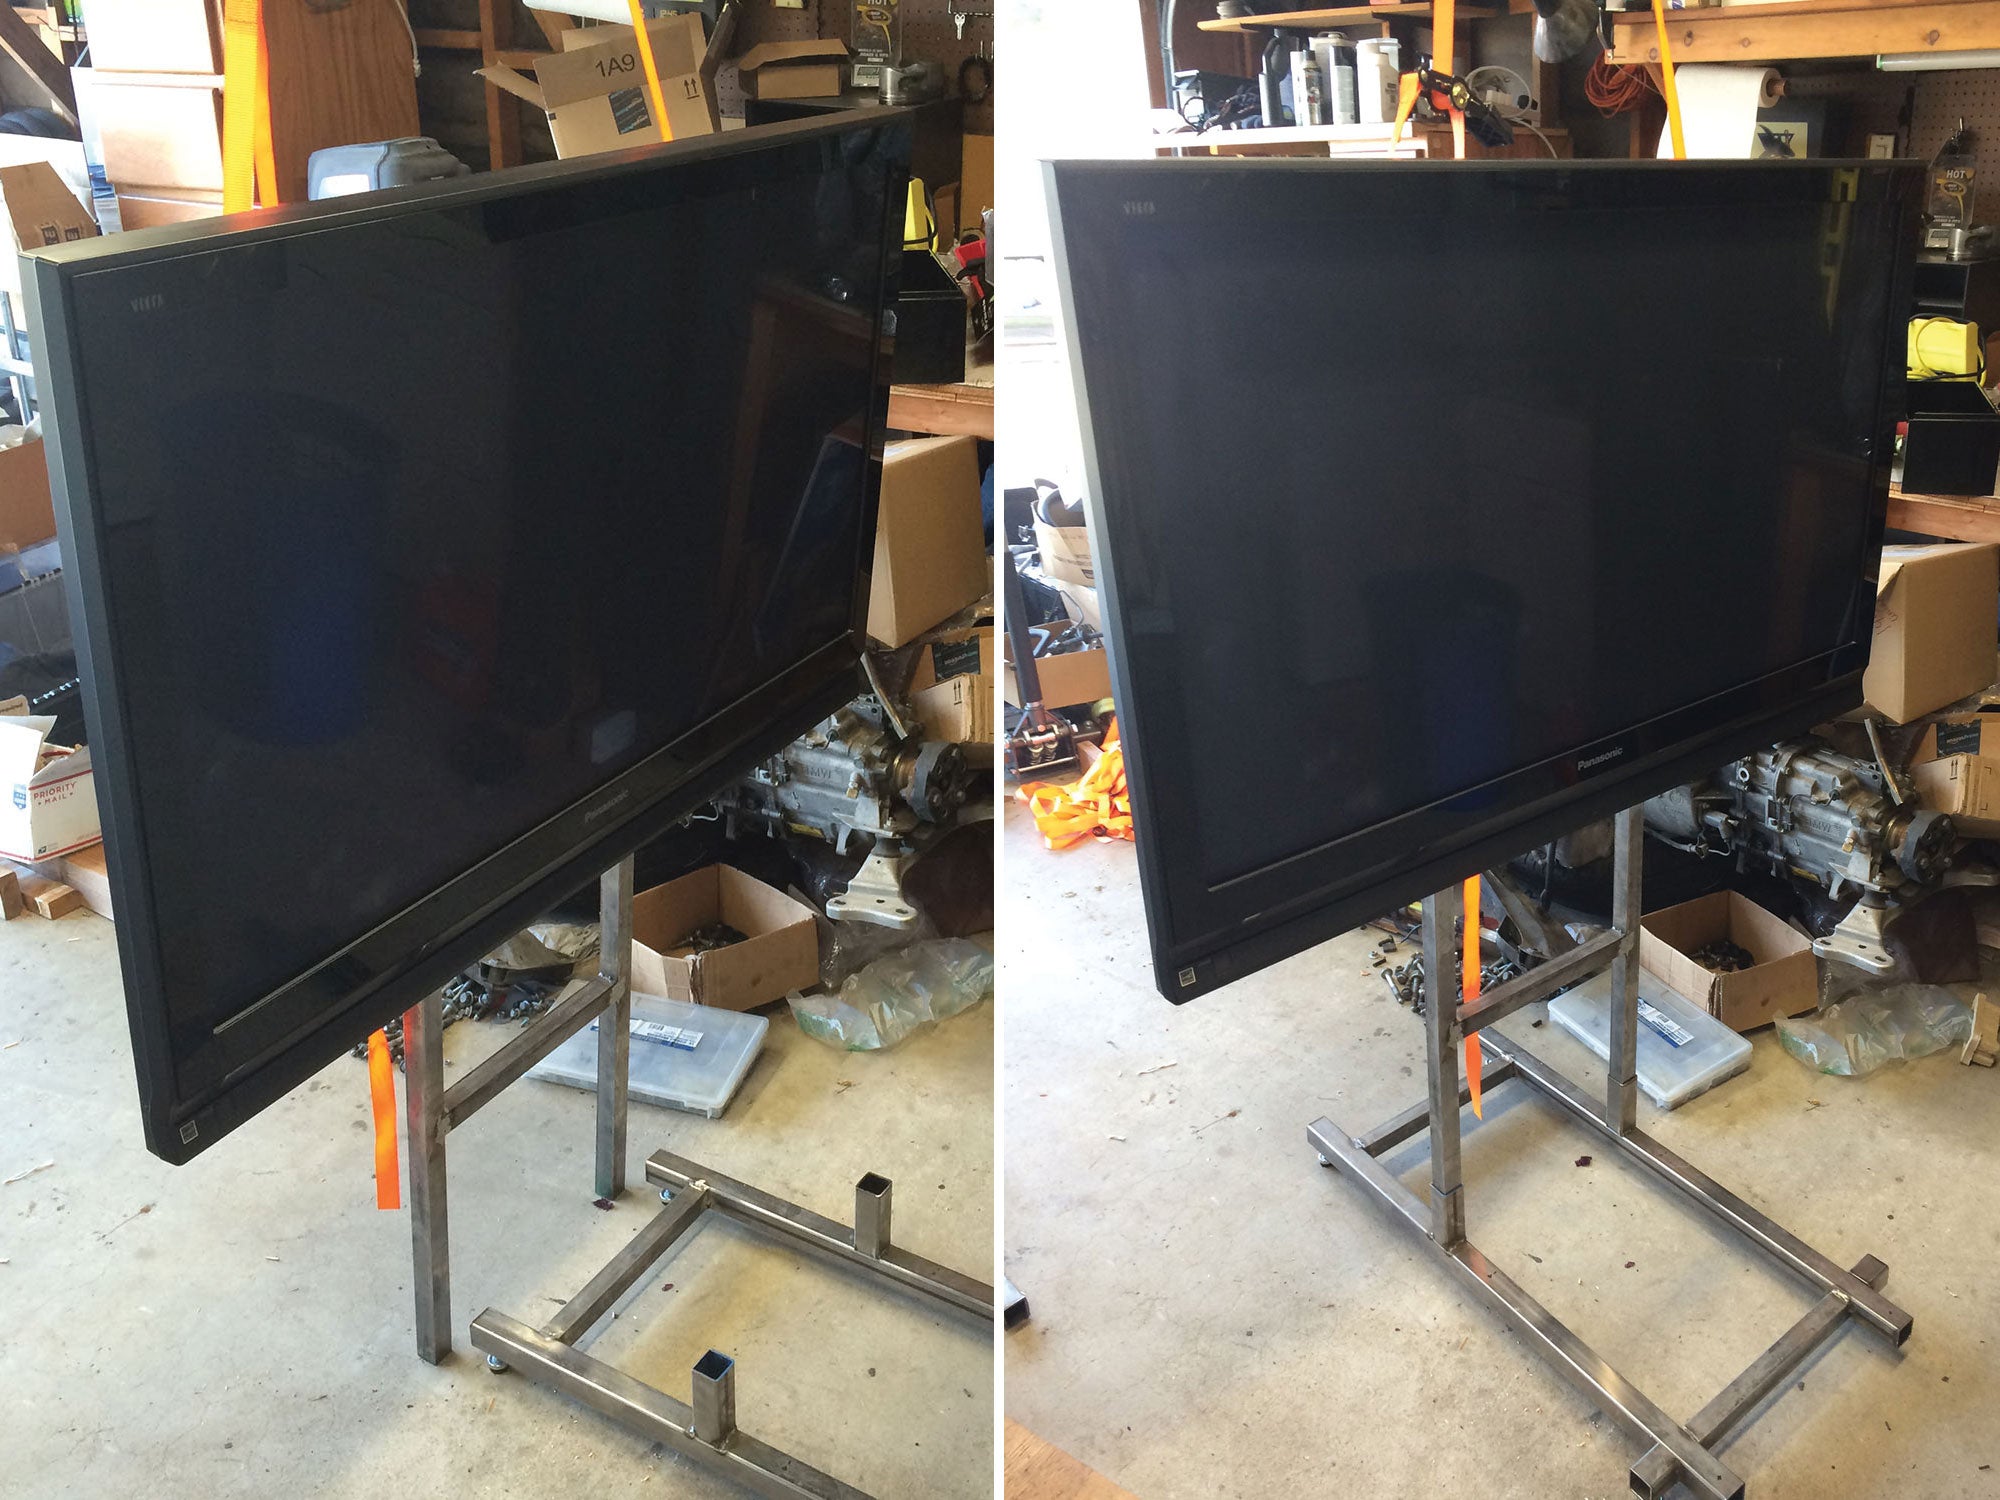
Then I muscled the TV and frame upright and held them up with a ratchet strap over a beam in the garage. Please ignore the massive mess. My garage is usually much cleaner, but I was stockpiling boxes for parts leftover from the M3 (plus the S54 and 6-speed). I’m so happy to have most of that stuff gone now, but a pile of boxed parts still remains (let me know if you need some E46 stock stereo equipment).
A few cranks on the strap and it raised up and into the mount on the base. Hooray! One section complete!
Well, the seat base was also complete, but it’s not “done” until the seat is mounted and not coming off again.
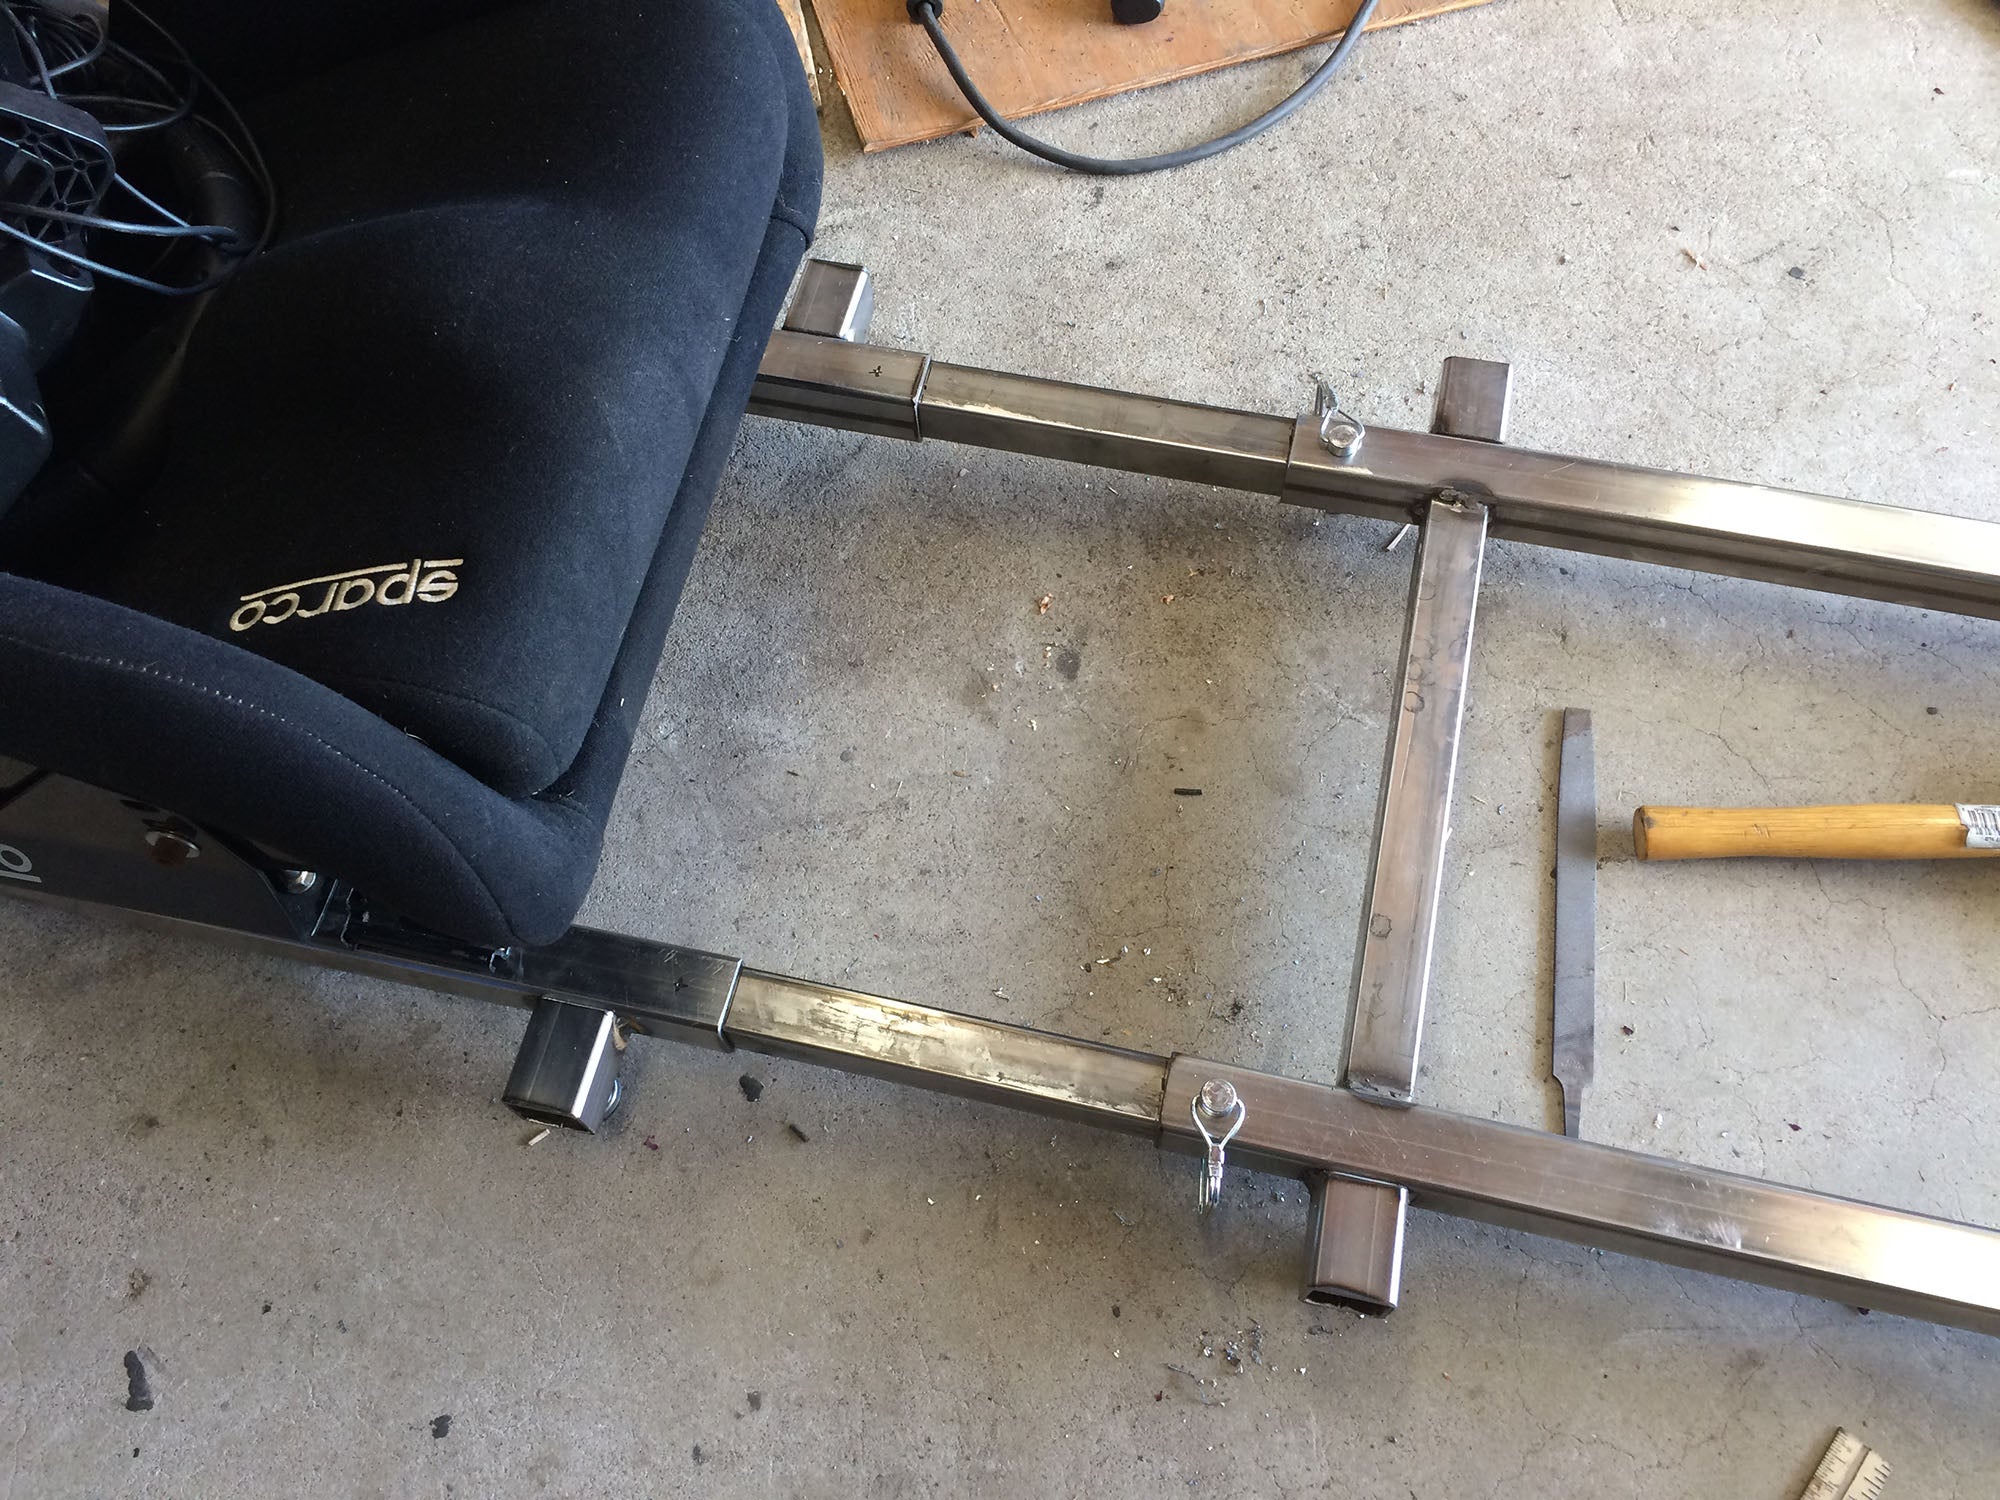
Now I can join the seat base and TV stand with the center section that will hold the steering wheel. These two sections of square tube fit right in and extend about 4" into either side. The pins will hold it all together so it doesn’t slide apart under over-excited use (BRAKE! BRAKE!).
Two cross bars later and it all holds together. I will then add a short section between these two that will hold the upright bar for the steering wheel.
The mounting solution for the steering wheel is something a wracked my head on for a while. It needed to be adjustable in height for different-sized drivers, and I wanted it to be center mounted so your legs could go on either side (as opposed to the frame coming up both sides and you having to slip your legs down the middle). Getting in and out of a high-sided racing seat is already hard enough.
I had thought about making it extra complex, with some sort of cantilevered arm or double articulating arms (like the adjustable arm rests on an office chair), but then talking to my dad he suggested making it like a bike seat post. Hmmm. So simple it just might work.
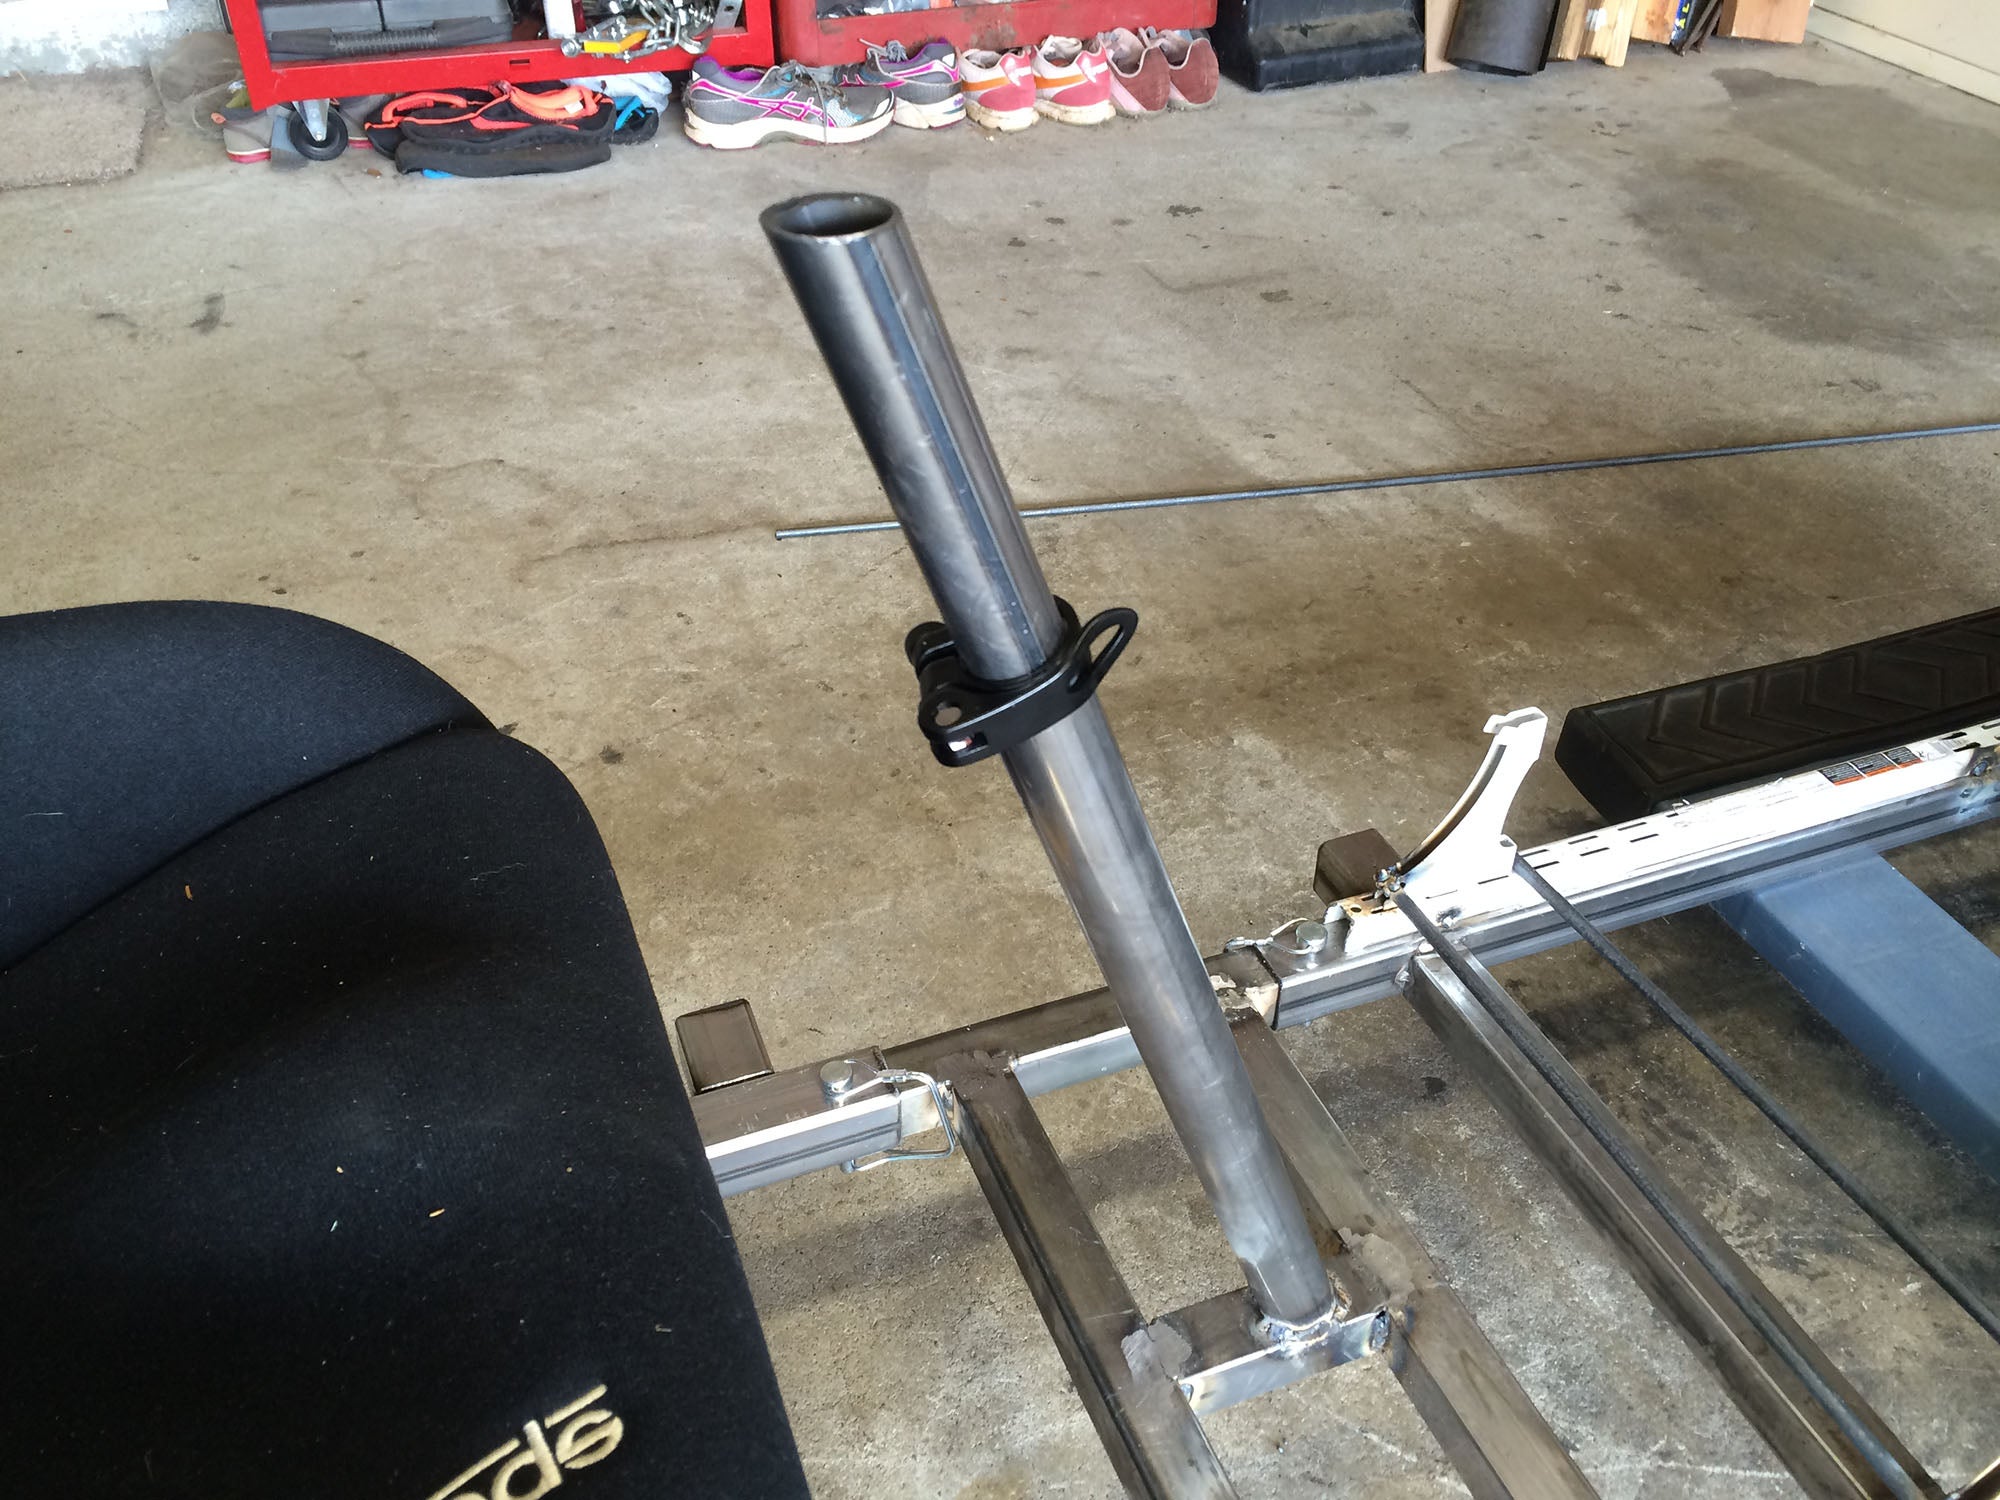
I found a section of tube that happened to be just the right diameter for a standard bike seat clamp (which I found on Amazon for $5). The clamp has a small lip on the top so it won’t slide down when you loosen it. I cut a notch down the base tube so the clamp can squeeze it, and found another tube that slips right in. Perfect! Both tubes were cut at the same angle (15 degrees) so that the mounting plate on the top will sit flat.
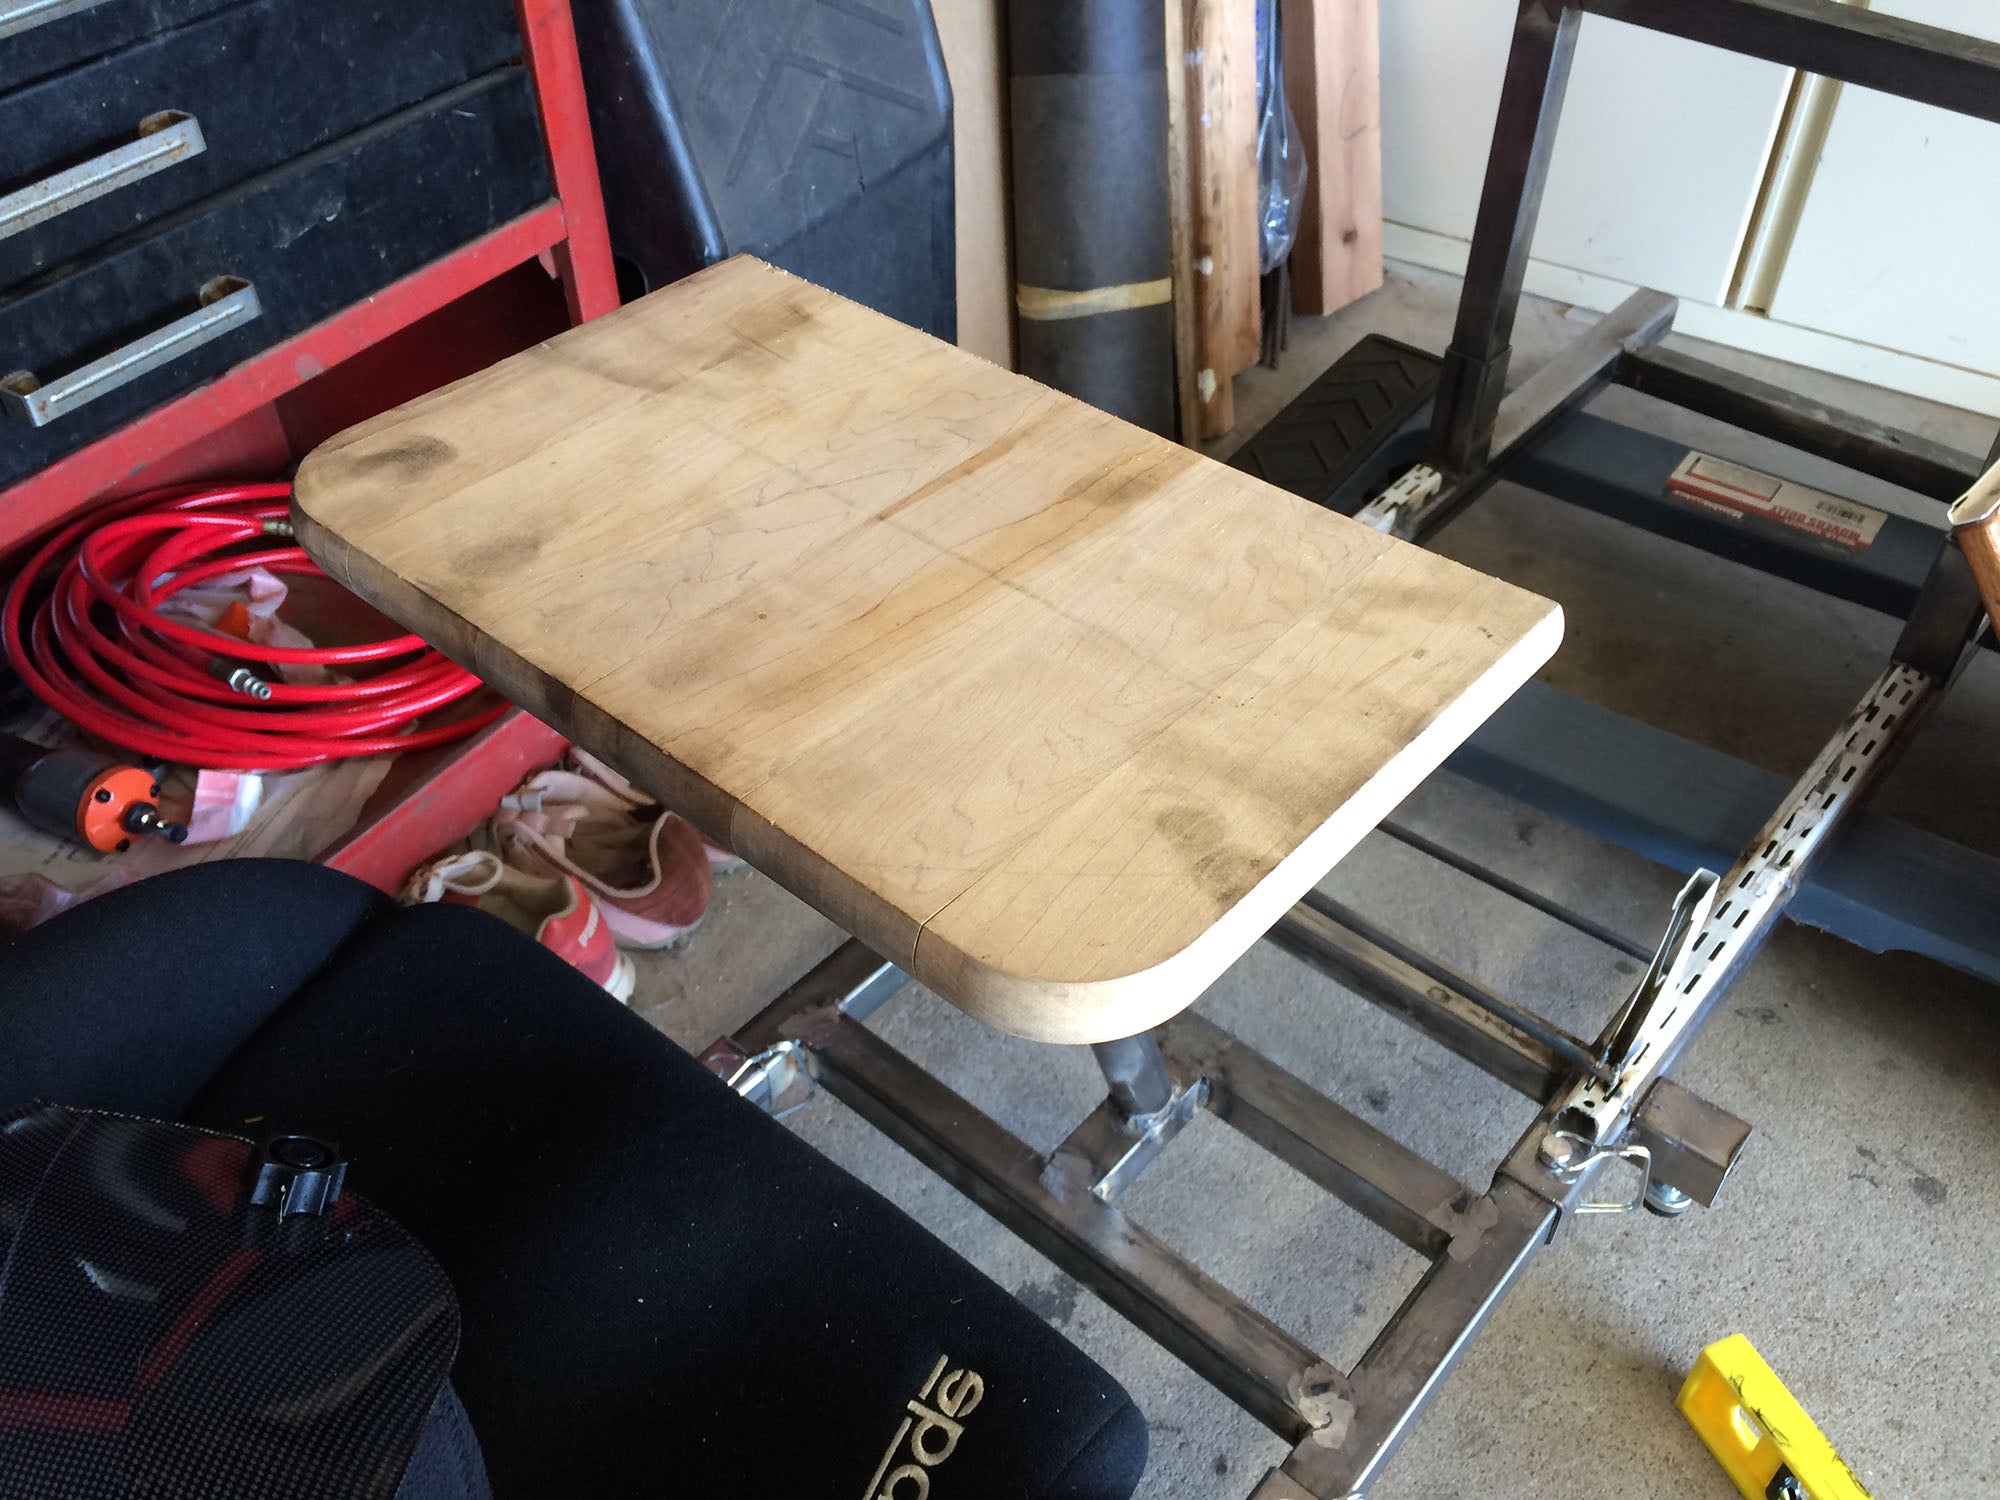
An old wood cutting board (that had been tossed in the scrap pile) happened to be about the right width, so I cut it down to the right length and screwed it into the mounting plate I welded to the top of the shaft.
Down to the home stretch! Just need to mount up the foot pedals and hook everything up.
 BmanUltima's car still hasn't been fixed yet, he'll get on it tomorrow, honest.
> It's a "Porch-uh"
BmanUltima's car still hasn't been fixed yet, he'll get on it tomorrow, honest.
> It's a "Porch-uh"
04/27/2016 at 17:51 |
|
Looking very nice. Do you have a shifter as well?
 MonkeePuzzle
> It's a "Porch-uh"
MonkeePuzzle
> It's a "Porch-uh"
04/27/2016 at 17:55 |
|
lol, my setup used a donated from work, very old and very heavy 60inch plasma, my frame looked over engineered too
 tromoly
> It's a "Porch-uh"
tromoly
> It's a "Porch-uh"
04/27/2016 at 17:57 |
|
You may want to make the wheel stand angle down towards you, making the steering shaft point at your shoulders, it’s much more comfortable that way.
|
It's a "Porch-uh"
> BmanUltima's car still hasn't been fixed yet, he'll get on it tomorrow, honest.
04/27/2016 at 18:00 |
|
Thanks! Not yet, but I can easily add one when I move the Logitech G920 out there.
|
It's a "Porch-uh"
> tromoly
04/27/2016 at 18:07 |
|
Stay tuned for Part 4 tomorrow! The mounting of the wheel is on my list of issues to fix.
 TheHondaBro
> It's a "Porch-uh"
TheHondaBro
> It's a "Porch-uh"
04/27/2016 at 18:13 |
|
I wish I had a MIG welder.
 chaozbandit
> It's a "Porch-uh"
chaozbandit
> It's a "Porch-uh"
04/27/2016 at 19:48 |
|
Looks great! I’ve always been playing around with the idea of making one out of wood since the designs are out there, but the material cost... eh.
Just out of curiosity, how much was the Sparco seat?
|
It's a "Porch-uh"
> chaozbandit
04/28/2016 at 11:36 |
|
Originally about $900. It was in my 944 and then the M3, but now it’s out of date so it’s perfect for this project (or 24hrs of LeMons with a back brace).